
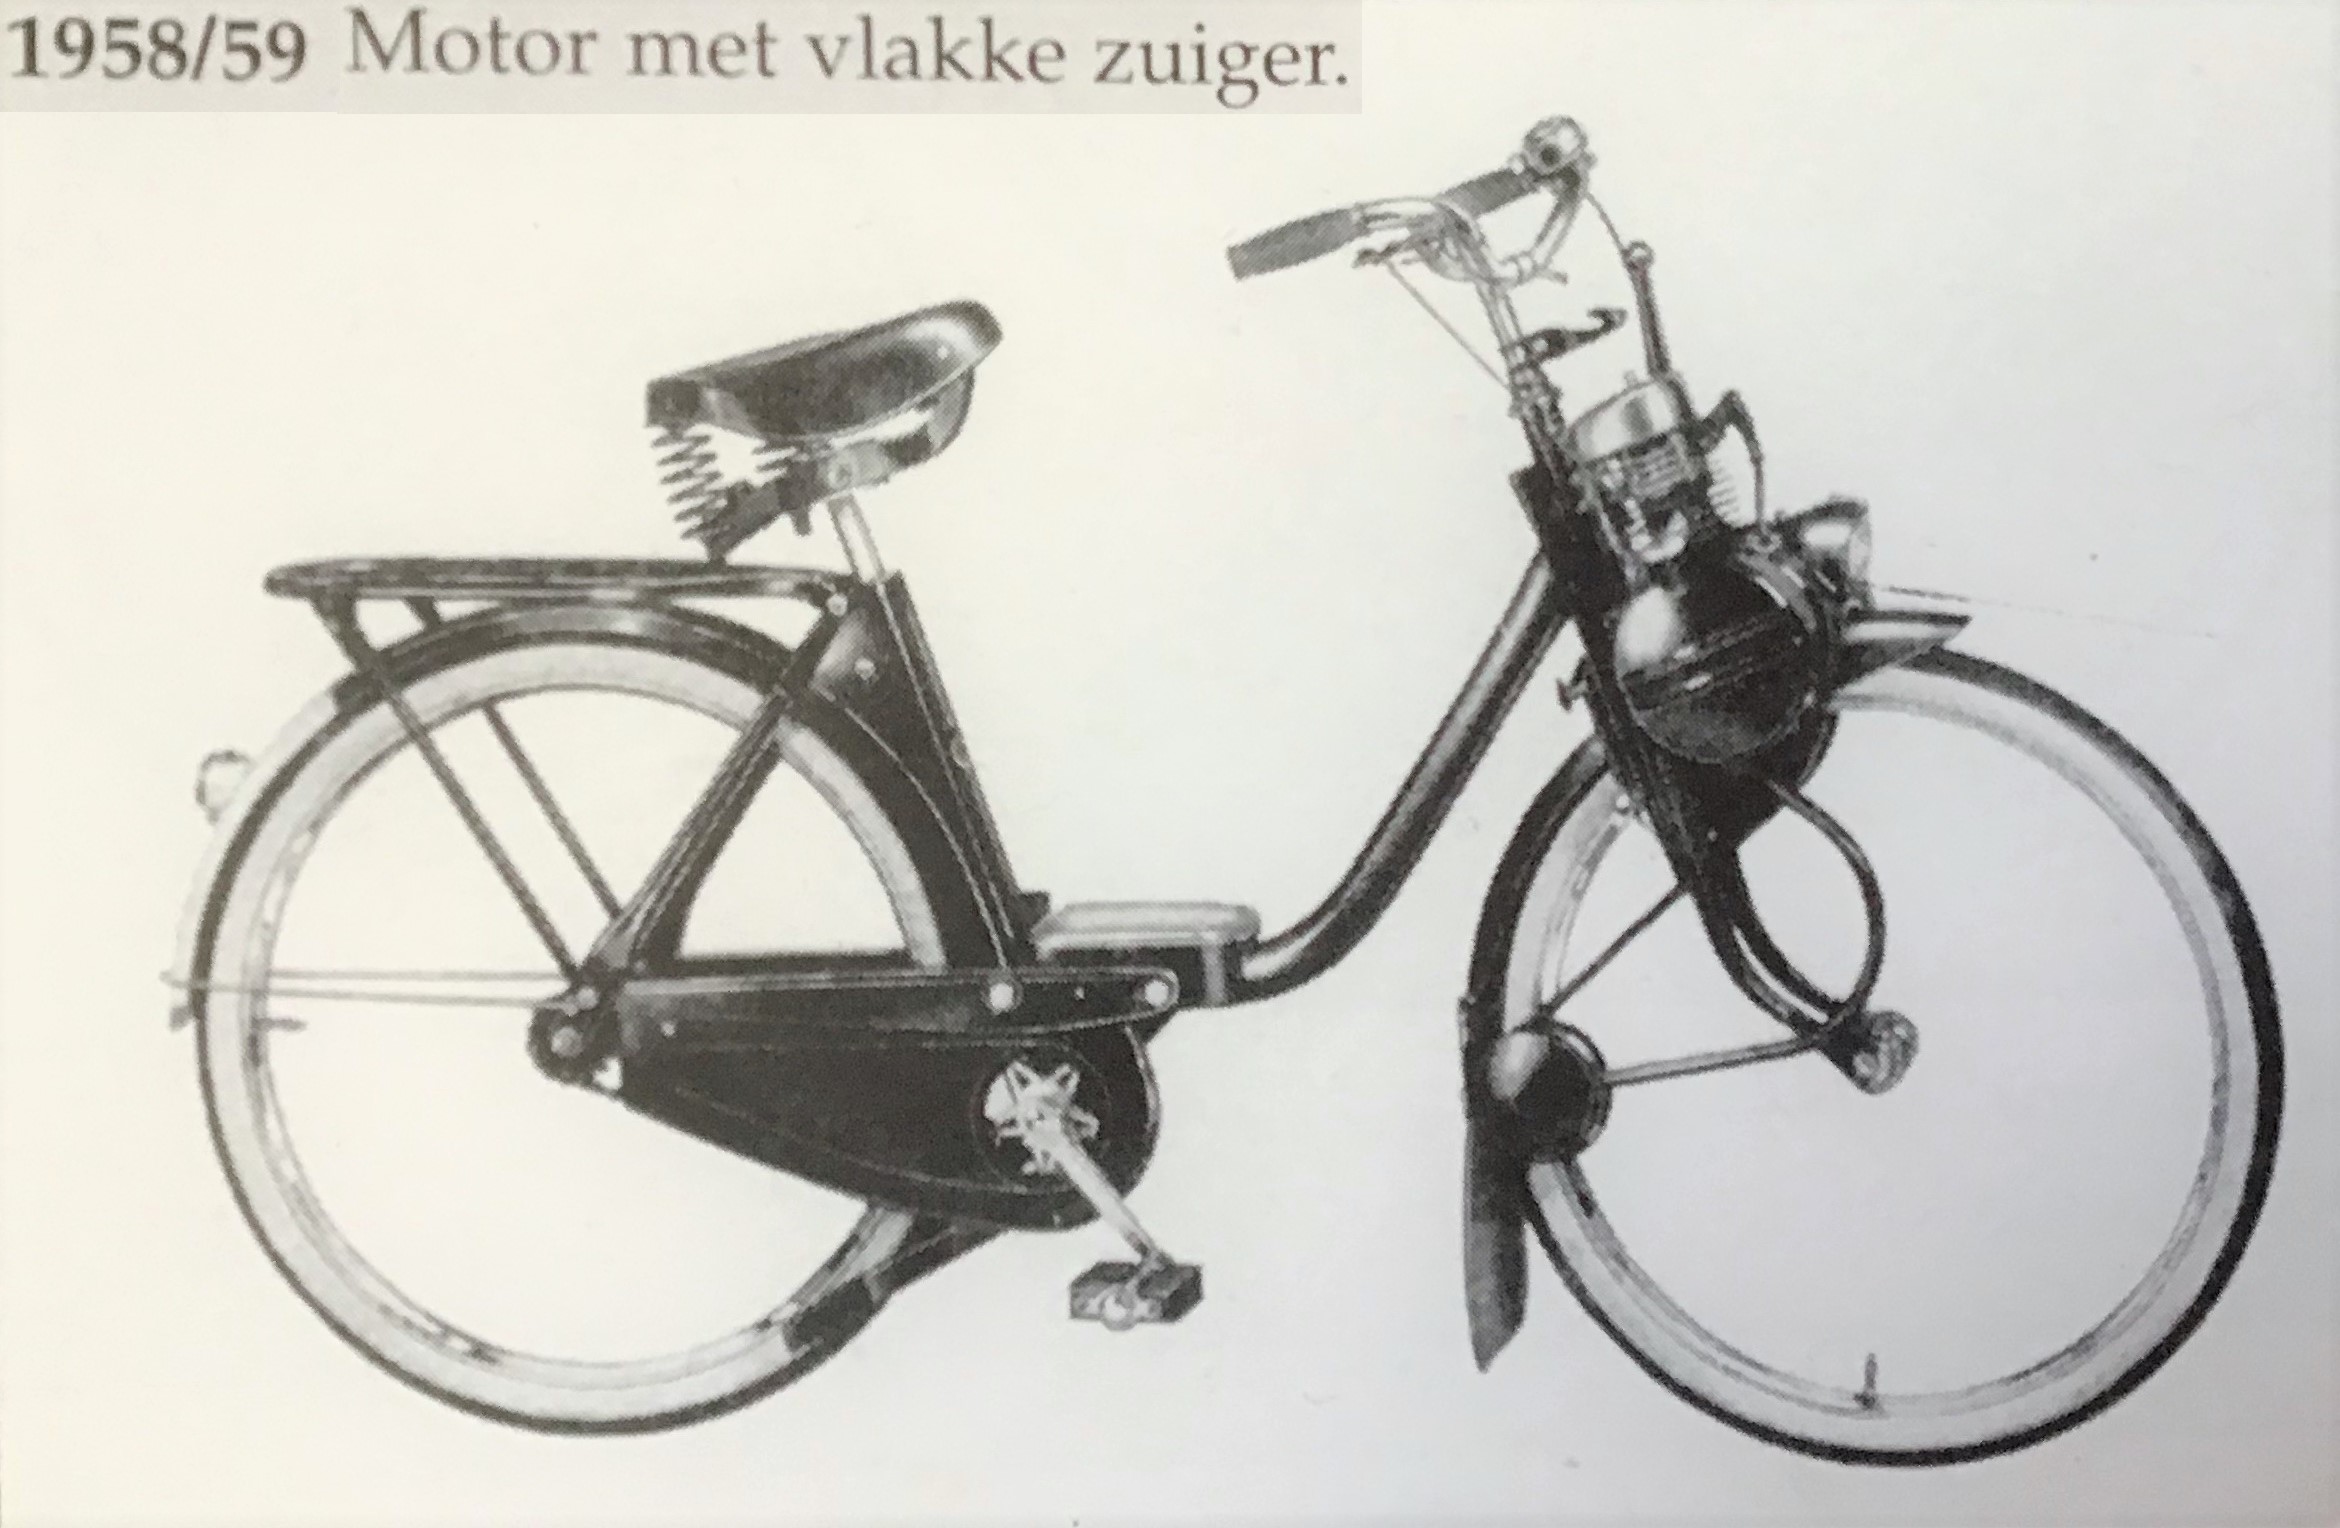
Early History
(from an anonymous 1971 American motorcycle book)
Yamaha Motor Company, Ltd. was established in 1955 as a small subsidiary of Nippon Gakki, Ltd., the world’s largest piano manufacturer. The firms entrance into the field of motorcycle production was hardly considered a threat by the giants of the industry, but after the first model was introduced and marketed later that same year, they quickly realized that Yamaha would soon be a formidable competitor.
1955 Yamaha YA-1
The first Yamaha was designated YA-1 and dubbed the “Red Dragonfly”. It was styled after the famous BMW and was powered by a single cylinder 125cc two stroke engine. This first effort was such a success that by 1959, the company was offering sports and utility models in 125, 175, and 250cc displacements. In 1960, their phenomenal growth continued, multiplying their original investment nearly thirty times and expanding their product line to include mopeds, boats, and outboard motors.
By that time, Asian export market had already proven very profitable, but it wasn’t until the early-to-mid-1960’s that foreign sales really began to soar: America discovered the Japanese motorcycle and suddenly the demand for them became overwhelming.
The motorcycle industry’s heated competition for this new market was eventually carried to the European Grand Prix circuit, where Yamaha and their rivals locked horns in a furious racing and development battle. Factory engineers worked frantically to provide faster and more powerful machines for the Grand Prix effort, and as a result, two-stroke motorcycle technology advanced by leaps and bounds. The Yamaha racing team won five world championships.
After development and thorough testing the products of this racing program were employed on production machines: mainly, the rotary valve in 1961, Autolube oil injection in 1963 and the five-port (twin intake port) cylinder in 1968, and the reed valve in 1973.
Meanwhile Yamaha Motor Company, Ltd. continued to grow – building nine new plants in Japan, Taiwan, Mexico, Costa Rica, Equador, and Guatemala. In addition to achievement awards in motorcycle engineering, the company also received great acclaim for their design of the Toyota 2000 GT in 1966, and the introduction of Yamaha snowmobiles in 1968.
Most recently, the firm has built a new test facility in Japan and introduced a complete line of off-road Enduro and Motocross motorcycles. They have also expanded their street motorcycle offering by applying their Toyota 2000 GT experience to the construction of Yamaha’s first four stroke model-the 1970-1971 XS1.
The Yamaha trademark of three crossed tuning forks has now become a familiar sight all over the world and serves as a subtle reminder of the firm’s musical origin. Their motorcycle products currently range from the 1971 58cc Mini-Enduro to racing’s “dynamic duo”, the 1971 250cc TD and 350cc TR road racers. There is a model to suit every enthusiast and each one reflects, as Yamahas always have, the ever-growing interests of the motorcycling public.
 Yamaha (US models) 1962-1992
Here are listed all the vintage Yamaha motorcycle and scooter models that sold new in the USA. Worldwide there are many more Yamaha models. Some of those are the same as US models, and some are different. Here the focus is on the smaller 50-80cc Yamahas that are like mopeds. Many of those small Yamahas are also shown in photos and explained.
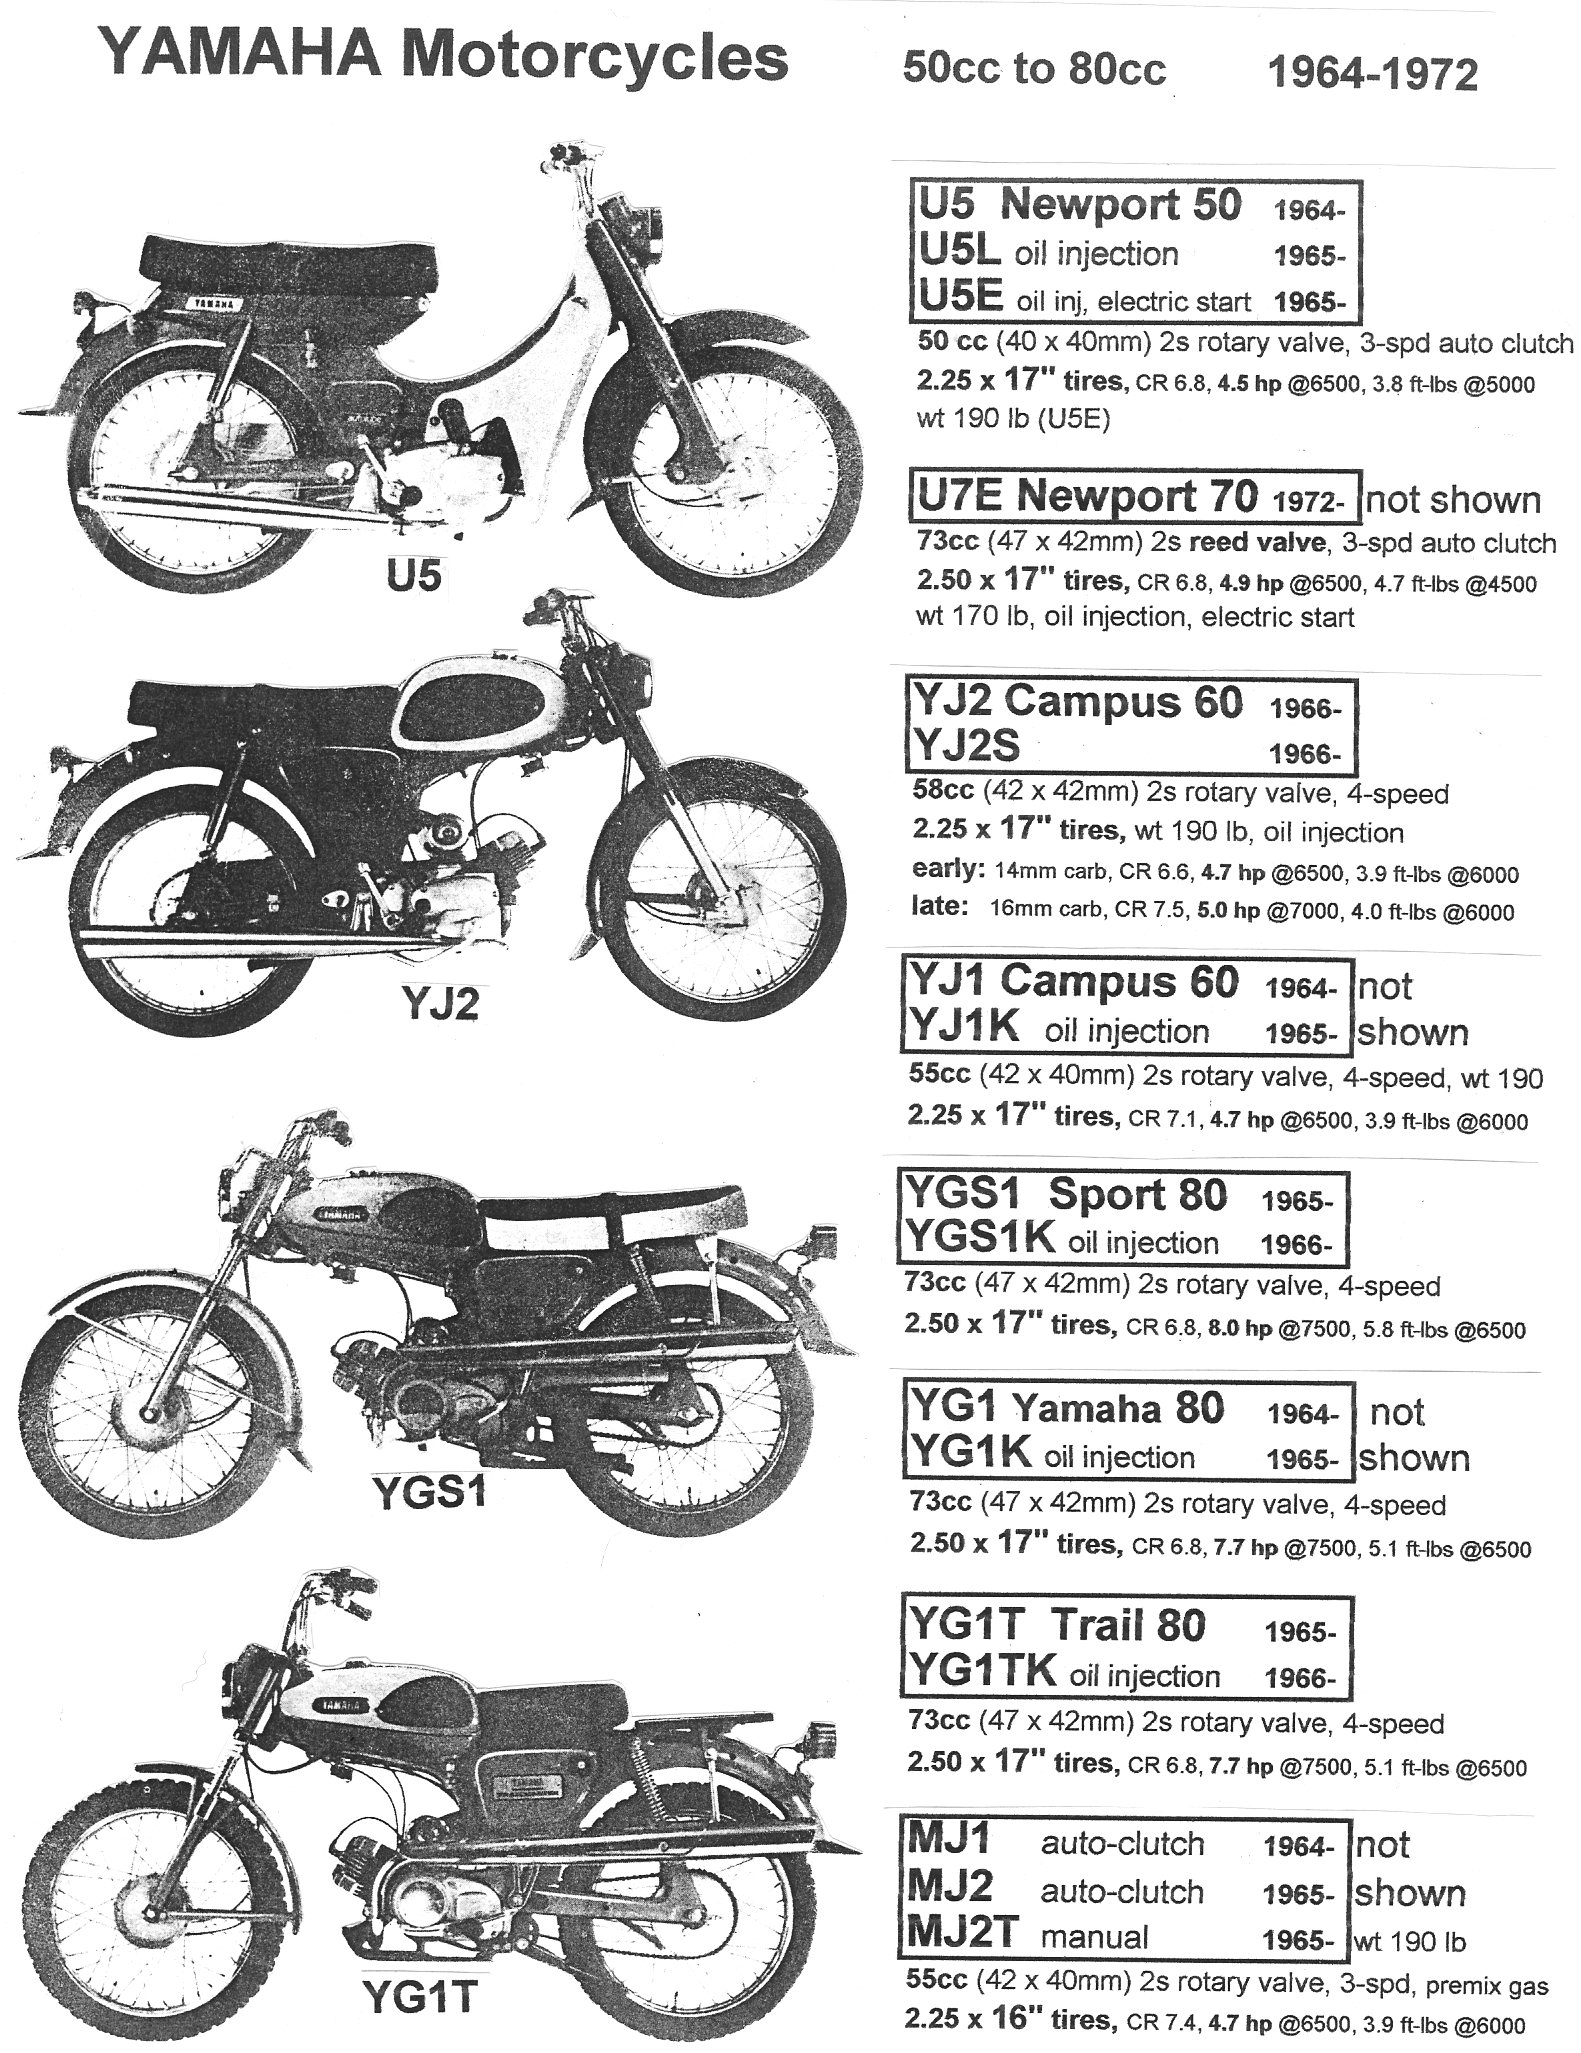
Yamaha 1964-67
1962 Yamaha
0055 MJ2 Omaha (55cc rotary valve 3-speed)
0055 MJ2T Trail 55 (55cc rotary valve 3-speed)
0250 YD3 Sport 250 (246cc piston-port twin 4-sp)
0250 YDS2 Super Sport (246cc piston-port twin 4-sp)
0250 TD1 (Road Racer) (246cc piston-port twin 5-sp)
1963 Yamaha
0055 MJ2 Omaha 55 (55cc rotary valve 3-speed)
0055 MJ2T Trail 55 (55cc rotary valve 3-speed)
0080 YG1T Trailmaster (73cc rotary valve 4-sp)
0250 YD3 Sport 250 (246cc piston-port twin 4-sp)
0250 YDT1 Touring (246cc piston-port twin 4-sp)
1964 saw the introduction of Autolube oil injection on all models. With the new lubrication system and other improvements, the YJ1 became the YJ2, the YG1K became the YG1K (same) and YGS1T, the YDS2 became YDS3C.
1964 Yamaha
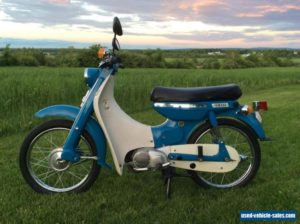
0050 U5 Newport (50cc rotary valve 3-sp auto-clutch)
0055 MJ2 Omaha 55 (55cc rotary valve 3-speed)
0055 MJ2T Trail 55 (55cc rotary valve 3-speed)
0060 YJ2 Campus 60 (58cc rotary valve 4-speed)
0080 YG1T Trailmaster (73cc rotary valve 4-speed)
0080 MG1T Omaha 80 (73cc rotary valve 4-speed)
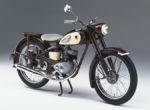
0125 YA5 Santa Barbara (123cc rotary valve 4-speed)
0250 TD1B (Road Racer) (246cc piston-port twin 5-sp)
With the addition of electric starting, the U5 and YA5 became U5E and YA6.

Yamaha 1964-72
1965 Yamaha
0050 U5L, U5E Newport (50cc rotary valve 3-sp auto-clutch)
0060 YJ2 Campus 60 (58cc rotary valve 4-speed)
0080 MG1T Omaha 80 (73cc rotary valve 4-speed)
0080 YG1T/YG1TK Trail 80 (73cc rotary valve 4-sp)
0125 YA6 Santa Barbara (123cc rotary-valve 4-speed)
0250 YDS3 Super Sport (246cc piston-port twin 5-sp)
0250 YDS3C Catalina 250 (246cc piston-port twin 5-sp)
0305 YM1 Catalina 305 (305cc piston-port twin 5-sp)
1966 Yamaha
0050 U5E Newport 50 (50cc rotary valve 3-sp auto-clutch)
0080 YGS1 Sport 80 (73cc rotary valve 4-speed)
0080 YGS1T Trail 80 (73cc rotary valve 4-speed)
0100 YL1 Twin Jet 100 (98cc piston-port twin 4-sp)
0125 YA6 Santa Barbara (123cc rotary valve 4-speed)
0125 YA6B Santa Barbara (123cc rotary valve 4-speed)
0250 YDS3 Super Sport (246cc piston-port twin 5-sp)
0250 YDS3C Catalina 250 (246cc piston-port twin 5-sp)
0305 YM1S Catalina Sport (305cc piston-port twin 5-sp)
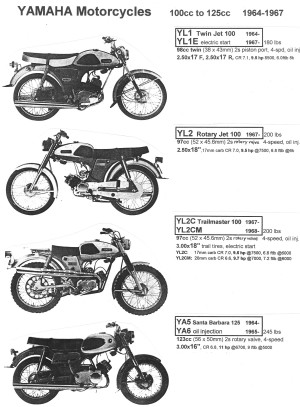
1967 saw new models YL2, YCS1, YR1 and primary kickstarting on some models. With the addition of electric starting, the YL1 became the YL1E and the YDS3C became the DS5. The new YL2C and YCS1 were also equipped with electric starters.
1967 Yamaha
0050 U5E Newport 50 (50cc rotary valve 3-sp auto-clutch)
0100 YL1E Twin Jet 100 (98cc piston-port twin 4-sp)
0100 YL2 Rotary Jet 100 (97cc rotary valve 4-speed)
Yamaha 1968-73
0100 YL2C Trailmaster (97cc rotary valve 4-speed)
0180 YCS1 Bonanza 180 (180cc piston-port twin 5-sp)
0250 DS5 Yamaha 250 (246cc piston-port twin 5-sp)
0250 TD1C (Road Racer) (246cc piston-port twin 5-sp)
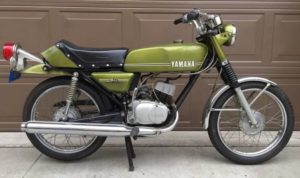
0350 YR1 Gran Prix 350 (348cc piston-port twin 5-sp)
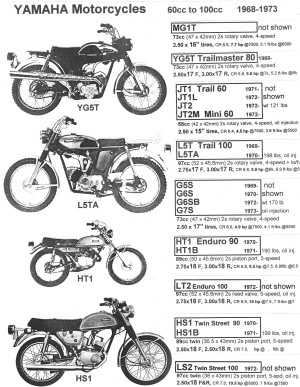
1968 saw the introduction of a new 5-port cylinder design on the DT1, YAS1C and YR2C. (5-port means 2-intake ports, 2-transfers, 1-exhaust) With the addition of electric starting and other changes, the YG1K and YGS1T became the YG5T, and the YCS1 became the YCS1C.
1968 Yamaha
0080 YG5T Trailmaster 80 (73cc rotary valve 4-speed)
0100 YL2CM Trailmaster (97cc rotary-valve 4-speed)
0125 YAS1C Scrambler 125 (124cc piston-port twin 5-sp)
0180 YCS1C Bonanza 180 (180cc piston-port twin 5-sp)
0250 DS5 Scrambler 250 (246cc piston-port twin 5-sp)
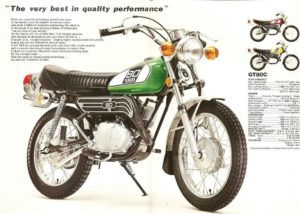
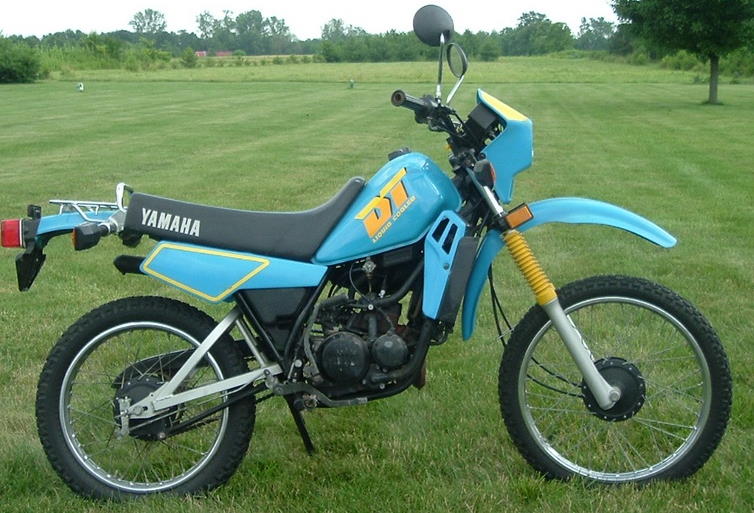
0250 DT1 Enduro 250 (246cc piston-port 5-speed)
0350 YR2 Gran Prix 350 (348cc piston-port twin 5-sp)
0350 YR2C Scrambler 350 (348cc piston-port twin 5-sp)
1969 saw new models AT1 (electric start), CT1, L5T (electric start and two-range, 3-speed transmission. The YA1SC became the AS2C and the YG5T became the G5S (without electric starting). The DS5 of 1967 evolved into the DS6C (without electric start). The YR2C became the newly styled R3. DT1 became DT1B. The five-port cylinder design was now used on all of the piston-port (piston-controlled induction) engines. Rotary (disc) valve engines do not have any intake ports in the cylinder at all, so the new split intake port design did not apply to them.

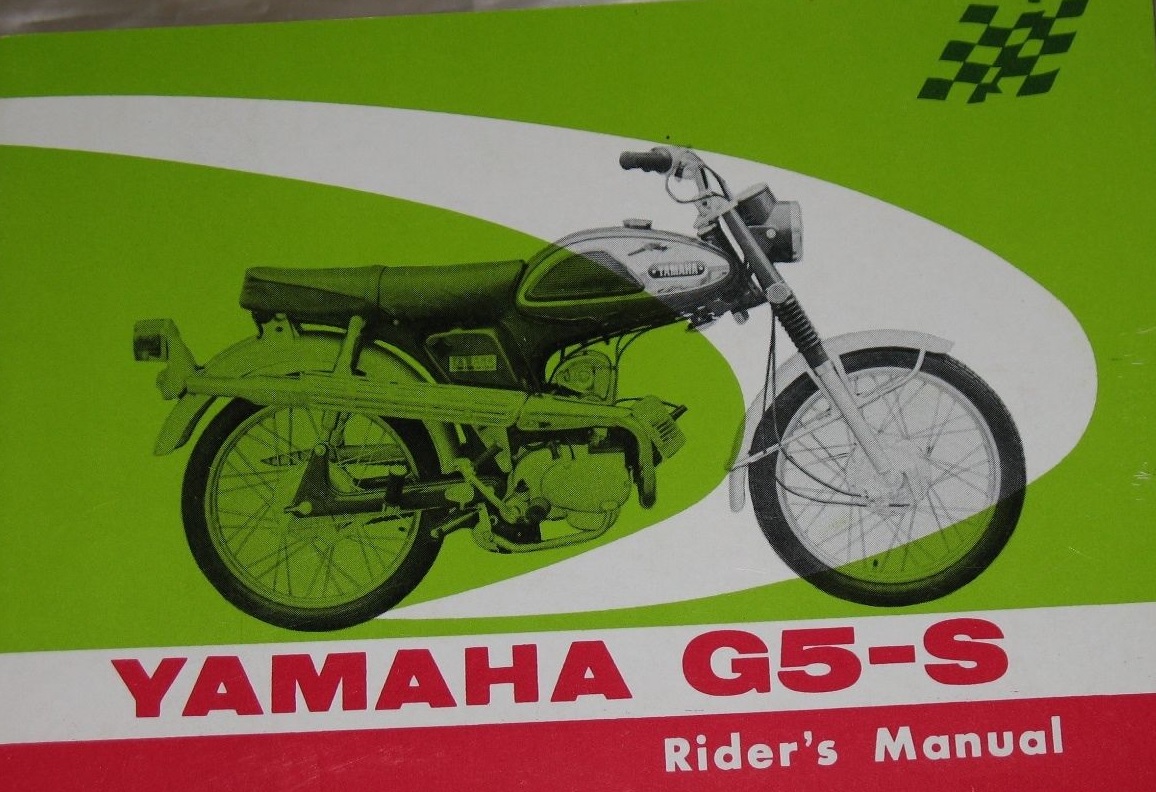
1969 Yamaha G5-S
1969 Yamaha
0080 G5S Yamaha 80 (73cc rotary valve 4-speed)
0100 L5T Trail 100 (97cc rotary-valve 2 x 3 speed)
0125 AS2C Scrambler (124cc piston-port twin 5-sp)
0125 AT1E Enduro 125 (123cc piston-port 5-speed)
0125 AT1M Enduro 125 (123cc piston-port 5-speed)
0175 CT1 Enduro 175 (171cc piston-port 5-speed)
0250 DS6C Scrambler (246cc piston-port twin 5-sp)
0250 DT1B Enduro (246cc piston-port 5-speed)
0250 DT1S Enduro (246cc piston-port 5-speed)
0350 R3 Sport 350 (348cc piston-port twin 5-speed)
1970 saw new models HS1, HT1, RT1, XS1 and the introduction of Keystone-type (trapezoidal or slanted-top) piston rings. The YCS1C and R3 were completely revamped to produce the CS3C and R5. With new styling and internal improvements the G5S, AT1, L5T, CT1, DT1B and D6SC became the G6S, AT1B, L5TA, CT1B, DT1C and DS6B. The five-port cylinder was also used on the new HS1, HT1, and RT1.
1970 Yamaha
0080 G6S Yamaha 80 (73cc rotary valve 4-speed)
0090 HS1 Twin Street (89cc piston-port twin 5-speed)
0090 HT1 Enduro 90 (89cc piston-port 5-speed)
0100 L5TA Trail 100 (97cc rotary-valve 2 x 3 speed)
0125 AT1B Enduro 125 (123cc piston-port 5-speed)
0125 ATM1B Enduro (123cc piston-port 5-speed)
0175 CT1B Enduro 175 (171cc piston-port 5-speed)
0200 CS3C Scrambler (195cc piston-port twin 5-sp)
0250 DS6B Scrambler (246cc piston-port twin 5-sp)
0250 DT1C/DT1CMX (246cc piston-port 5-speed
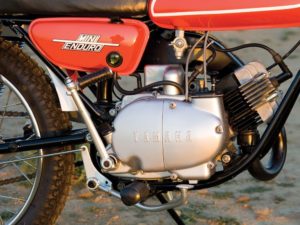
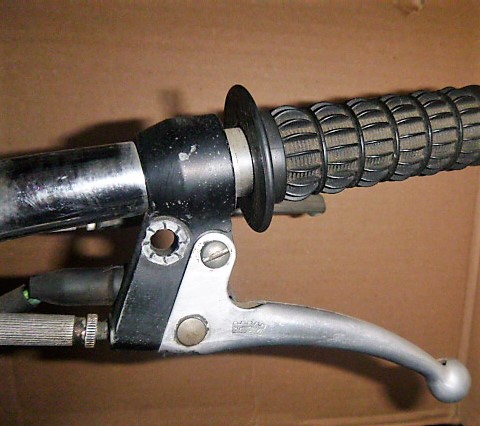
1971 Yamaha JT1 Mini Enduro
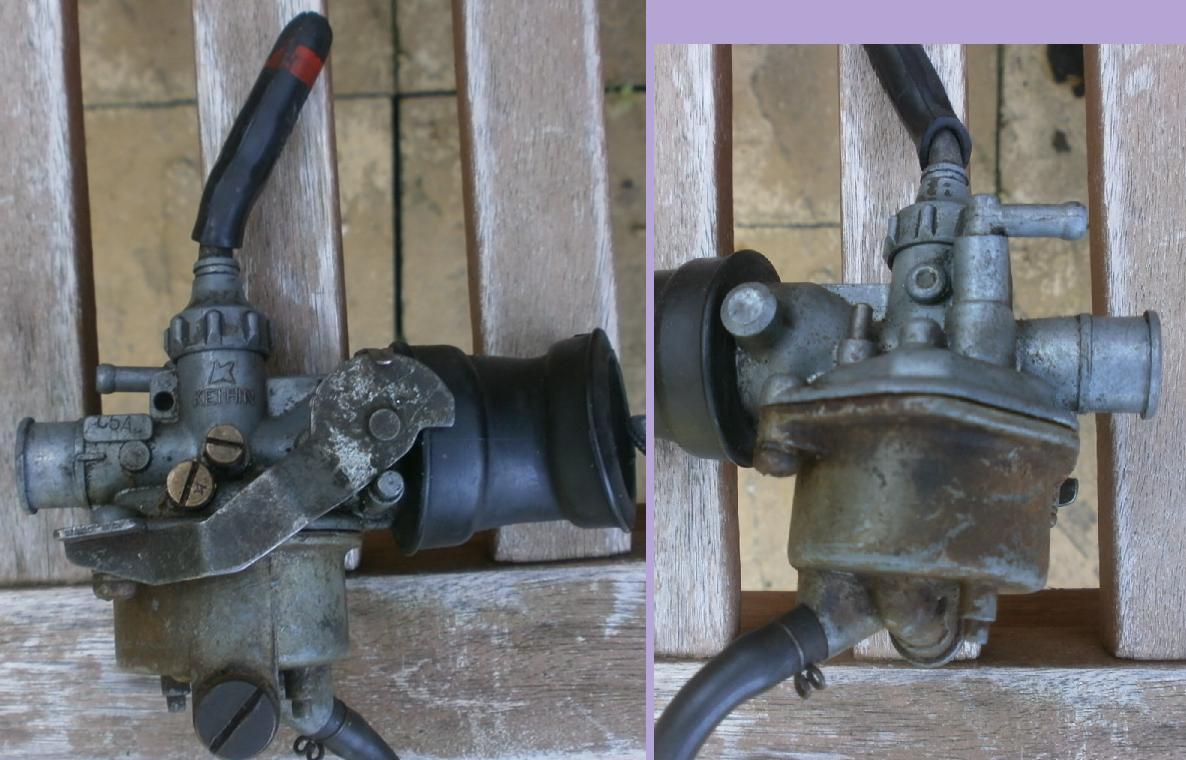
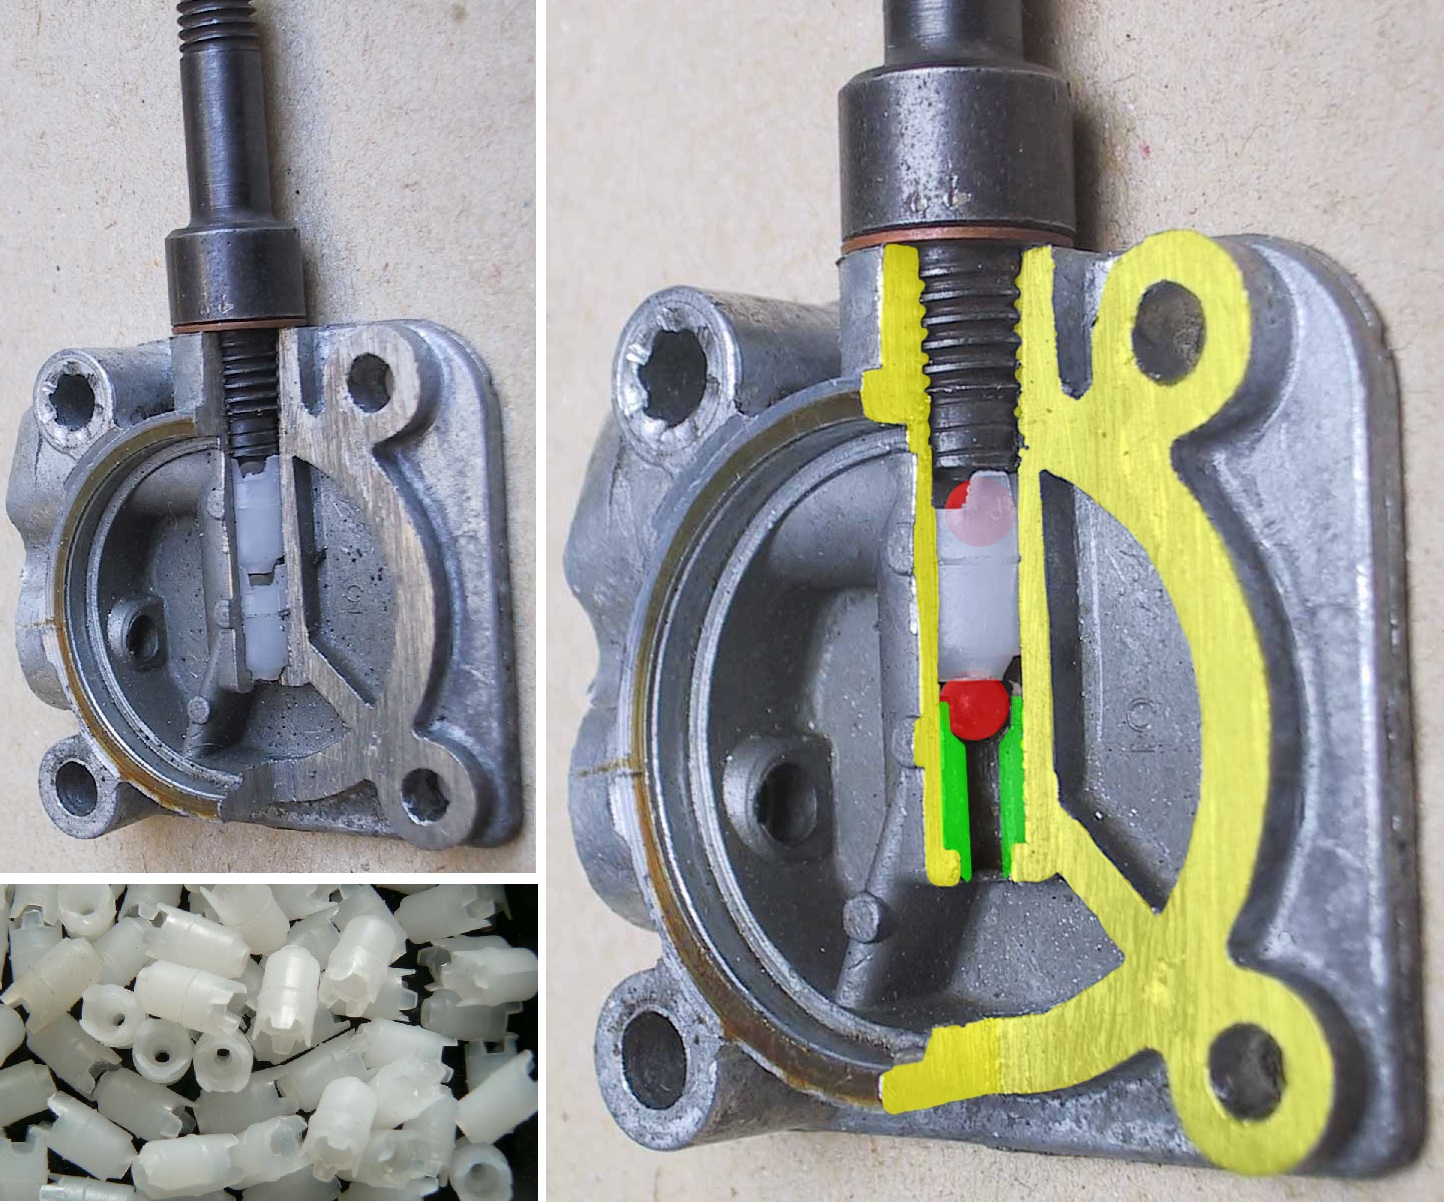
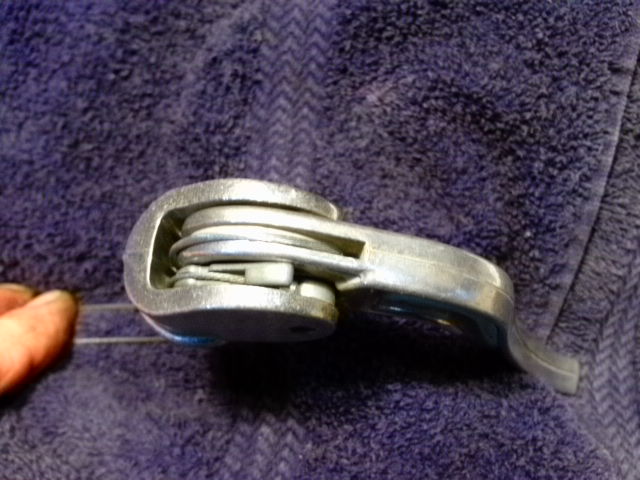
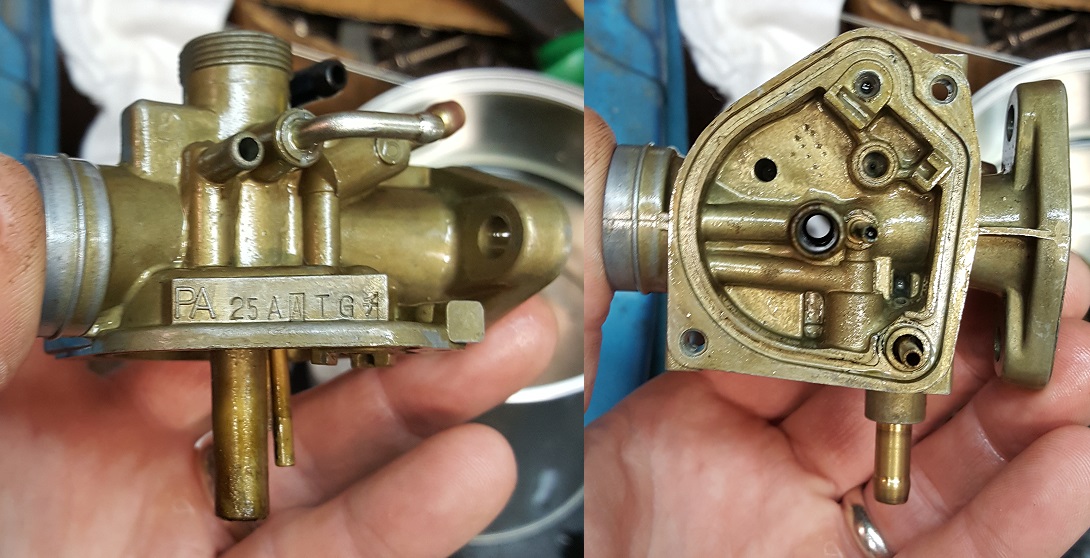
Notice how on a rotary valve two-stroke,
the carburetor is hidden behind the
cover where the clutch normally is.
0250 TD2 (Road Racer)
0350 TR2 (Road Racer)
0350 R5 Sport 350 (347cc piston-port twin 5-sp)
0360 RT1/RT1M Enduro (351cc piston-port 5-sp)
0650 XS1 (4 stroke twin) (653cc SOHC 5-speed)
1971 saw the new JT1 Mini Enduro. All 1971 models carried a last letter designation change from their 1970 versions. (Some end letters increased, like B to C, and others decreased, like C to B) For example, the HT1 of 1970 became the HT1B of 1971, even though very few changes were made.
1971 Yamaha
0060 JT1 Mini Enduro (58cc rotary valve 4-speed)
0080 G6SB Yamaha 80 (73cc rotary valve 4-speed)
0090 HS1B Twin Street (89cc piston-port twin 5-sp)
0090 HT1B Enduro 90 (89cc piston-port 5-sp)
0090 HT1BM (off road) (89cc piston-port 5-sp)
0125 AT1C Enduro 125 (123cc piston-port 5-speed)
0125 AT1MX (Motocross) (123cc piston-port 5-speed)
0175 CT1C Enduro 175 (171cc piston-port 5-speed)
0200 CS3B Scrambler (195cc piston-port twin 5-speed)
0250 DT1E Enduro 250 (246cc piston-port 5-speed)
0250 DT1MX (Motocross) (246cc piston-port 5-speed)
0250 TD2B (Road Racer)
0350 TR2B (Road Racer)
0350 R5B Sport 350 (347cc piston-port twin 5-speed)
0360 RT1B/RT1MX Enduro (351cc piston-port 5-sp)
0650 XS1B (4 stroke twin) (653cc SOHC 5-speed)
1972 saw the introduction of reed valve induction on the AT2, CT2, DT2, RT2, and the new LT2 and U7E. The HS1 was enlarged to 97cc, restyled and designated LS2. The DS6 was completely revamped and designated DS7. The JT1 Mini Enduro was made available in either street trim (JT2L) or off-road trim (JT2M). The XS1 was fitted with a front disc brake and electric starting, and re-designated XS2.
1972 Yamaha U7E
1969 to 1972 Yamaha model names (except U5 and U7) had the engine size (cc) in the first letter J=60, G=80, H=90, L=100, A=125, C=175 or 200, D=250, R=350 or 360, X=650, followed by the bike type T=Trail, S=Street, M=Motocross.
1972 Yamaha
0160 JT2L Enduro 60 (58cc rotary valve 4-speed)
0160 JT2M Mini Enduro (58cc rotary valve 4-speed)
0370 U7E Newport 70 (73cc reed valve 3-sp auto-clutch)
0080 G7S Scrambler 80 (73cc rotary valve 4-speed)
0100 LS2 Twin Street 100 (97cc piston-port twin 5-sp)
0100 LT2/LT2M Enduro (97cc reed valve 5-speed)
0125 AT2 Enduro 125 (123cc reed valve 5-speed)
0175 CT2 Enduro 175 (171cc reed valve 5-speed)
0250 DT2 Enduro 250 (246cc piston-port 5-speed)
0250 DS7 (street twin) (246cc piston-port twin 5-sp)
0250 TD3 (Road Racer)
0350 TR3 (Road Racer)
0350 R5C Sport 350 (347cc piston-port twin 5-sp)
0360 RT2/RT2MX Enduro (351cc reed valve 5-sp)
0650 XS2 (4 stroke twin) (653cc SOHC 5-speed)
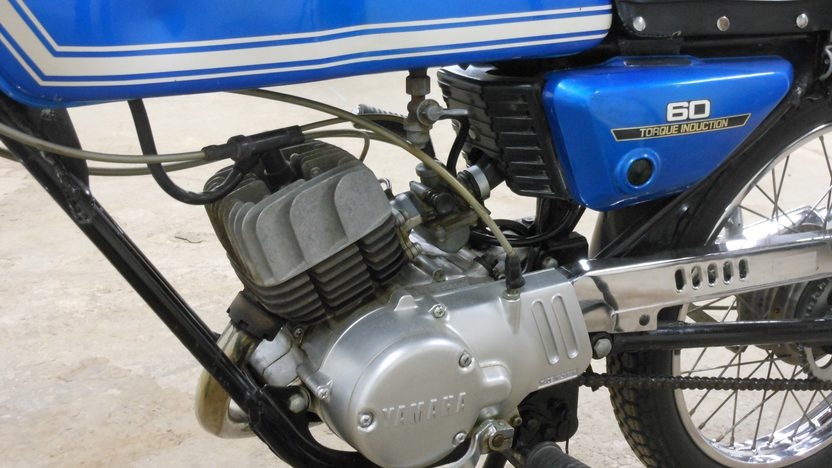
It’s reed valves for everyone! Small or big, single or twin, come and get your free 20% more torque! Soon reed valves were on all two-stroke Yamahas. Their side badges proudly said “Torque Induction”. In the following few years Suzuki, Kawasaki and most other two-stroke motorcycles switched to reed valve induction.
In 1973 the G7S, DT2, DS7, R5C were replaced by GT1, DT3, RD250, RD350 with reed valve cylinders and other improvements.
1973 was the beginning of standardized format model names, where the first two or more digits are letters that mean what model type, followed by two or more digits with numbers that mean what size engine.

1973 Yamaha RD60 with “Torque Induction”
1973 Yamaha
0060 RD60 (Street) (reed valve 5-speed)
0080 GT1 Enduro 80 (reed valve 5-speed)
0080 GTMX 80 (MX) (reed valve 5-speed)
0100 LT3 Enduro 100 (reed valve 5-speed)
0100 LTMX 100 (MX) (reed valve 5-speed)
0125 AT3 Enduro 125 (reed valve 5-speed)
0175 CT3 Enduro 175 (reed valve 5-speed)
0250 DT3 Enduro 250 (reed valve 5-speed)
0250 RD250 (Street) (reed valve twin 5-sp)
0250 MX250 (MX) (reed valve 5-speed)
0250 TZ250 (Road Racer)
0350 RD350 (Street) (reed valve twin 5-sp)
0360 MX360 (MX) (reed valve 5-speed)
0360 RT3 Enduro 360 (reed valve 5-speed)
0500 SC500 YZ (MX) (reed valve 5-speed)
0500 TX500 (Street) (SOHC twin 5-speed)
0650 TX650 (Street) (SOHC twin 5-speed)
0750 TX750 (Street) (SOHC twin 5-speed)
1974 was the “end of confusion” when all models names were standardized. RD means Street, GT means Enduro, DT means Dual Purpose, TY means Trials, IT means Off Road, MX means Motocross, YZ means Motocross Racer, TZ means Road Racer, TX or XS means Street 4-stroke. The last 1 or 2 digits are the year and version. For the year, 1974 is A, 75 is B, 76 is C, and so on. Letters that might be confusing are skipped. For 49-state and 50-state models, the version digit is blank. For California models it is C.
In this manner, the bike type, size and year are easy to see from the model name.
1974 Yamaha RD60
1974 Yamaha (suffix A)
0060 RD60A (2-stroke Street)
0080 GT80A (Enduro)
0080 GTMXA (Motocross)
0080 TY80A (Trials)
0080 YZ80A (MX Racer)
0100 MX100A (Motocross)
0125 MX125A (Motocross)
0125 YZ125A (MX Racer)
0175 MX175A (Motocross)
0200 RD200A (2-stroke Street)
0250 RD250A (2-stroke Street)
0250 TY250A (Trials)
0250 MX250A (Motocross)
0250 YZ250A (MX Racer)
1975 Yamaha GT80
0350 RD350A (2-stroke Street)
0350 TZ350A (Road Racer)
0360 MX360A (Motocross)
0360 YZ360A (MX Racer)
0500 SC500A (Motocross)
0500 TX500A (Street)
0650 TX650A (Street)
0750 TX750A (Street)
0750 TZ750A (Road Racer)
1975 Yamaha (suffix B)
0060 RD60B (2-stroke Street)
0080 GT80C (Enduro)
0080 GTMXB (Motocross)
0080 TY80B (Trials)
0080 YZ80B (MX Racer)
0100 DT100B (Dual Purpose)
0100 MX100B (Motocross)
0125 DT125B (Trail)

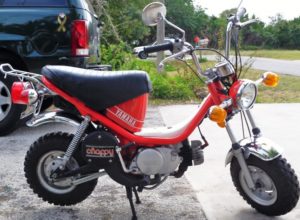
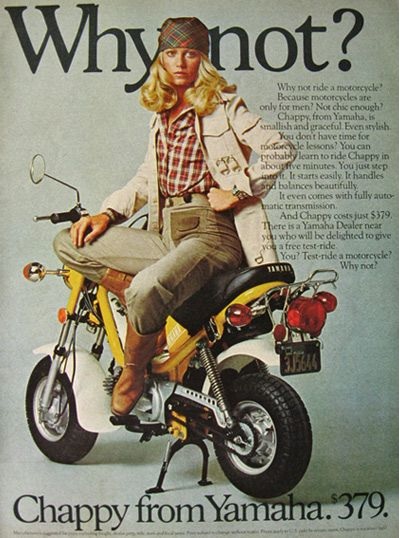
Yamaha Chappy ad
0125 TA125 (Road Racer)
0125 RD125B (2-stroke Street)
0125 MX125B (Motocross)
0125 YZ125B (MX Racer)
0175 DT175B (Trail)
0175 MX175B (Motocross)
0200 RD200B (2-stroke Street)
0250 RD250B (2-stroke Street)
0175 TY175B (Trials)
0250 MX250B (Motocross)
0250 YZ250B (MX Racer)
0350 RD350B (2-stroke Street)
0400 MX400B (Motocross)
0360 YZ360B (MX Racer)
0500 XS500B (Street)
0650 XS650B (Street)
01976 Yamaha (suffix C)
0080 GT80C (Dual Purpose)
0080 GTMXC (Motocross)
0080 YZ80C (MX Racer)
0080 LB80-2AC Chappy
0080 LB80-2HC Chappy
0100 DT100C (Dual Purpose)
0100 YZ100C (MX Racer)
0100 RS100C (2-stroke Street)
1976 Yamaha LB80-2 Chappy
0125 DT125C (Dual Purpose)
0125 RD125C (2-stroke Street)
0125 MX125C (Motocross)
0125 YZ125C (MX Racer)
0175 DT175C (Dual Purpose)
0175 TY175C (Trials)
0200 RD200C (2-stroke Street)
0250 DT250C (Dual Purpose)
0250 TY250C (Trials)
0250 TZ250C (Road Racer)
0350 TZ350C (Road Racer)
0360 XS360C (Street)
0400 RD400C (2-stroke Street)
0400 DT400C (Dual Purpose)
0400 IT400C (Off Road)
0400 YZ400C (MX Racer)
0500 XT500C (Street)
0500 XS500C (Street)
0650 XS650C (Street)
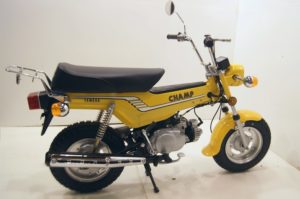
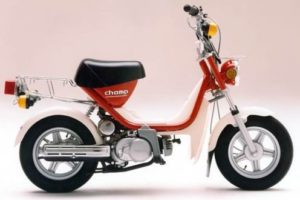
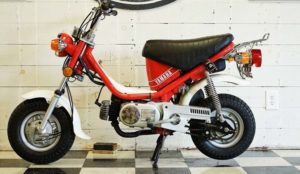
1977 Yamaha LB80-3 Champ
1977 Yamaha (suffix D)
0080 GTMXD (Motocross)
0080 YZ80D (MX Racer)
0080 LB80-2AD Chappy
0080 LB80-3D Champ
0100 DT100D (Dual Purpose)
0100 YZ100D (MX Racer)
0125 YZ125D (MX Racer)
0175 IT175D (Off Road)
0250 DT250D (Dual Purpose)
0250 TY250D (Trials)
0250 TZ250D (Road Racer)
0350 TZ350D (Road Racer)
0360 XS360D (Street)
0400 XS400D (Street)
0400 RD400D (2-stroke Street)
0400 DT400D (Dual Purpose)
0400 YZ400D (MX Racer)
0500 XT500D (Street)
0500 XS500D (Street)
0650 XS650D (Street)
0750 XS750D (Street)
0750 TZ750D (Road Racer)
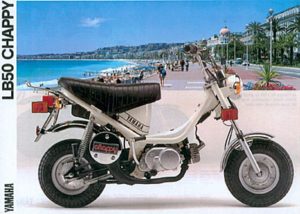
1978 Yamaha LB50-P Chappy
1978 Yamaha (suffix E)
0050 LB50-PE Chappy (2-stroke Street)
0080 GT80E (Dual Purpose)
0080 GTMXE (Motocross)
0080 YZ80E (MX Racer)
0080 LB80-2AE Chappy
0100 DT100E (Dual Purpose)
0100 YZ100E (MX Racer)
0125 YZ125E (MX Racer)
0125 DT125E (Dual Purpose)
0175 IT175E (Off Road)
0250 DT250E (Dual Purpose)
0250 TZ250E (Road Racer)
0350 TZ350E (Road Racer)
0400 RD400E (Street)
0400 DT400E (Dual Purpose)
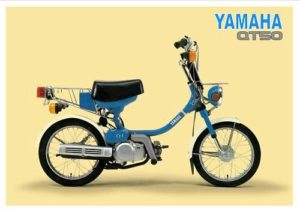
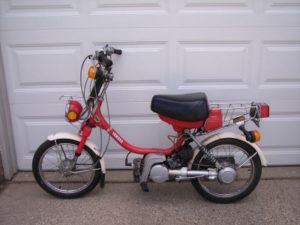
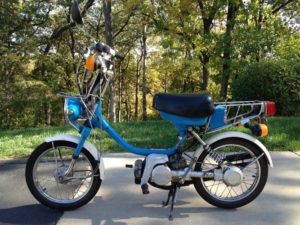
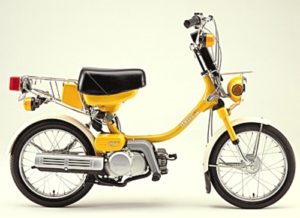
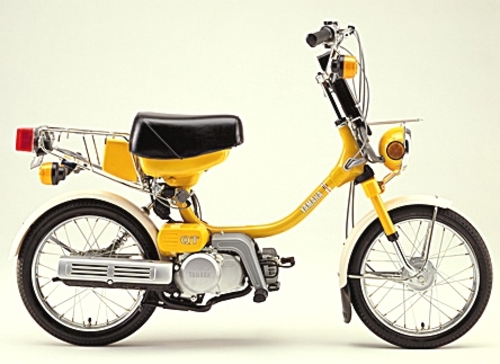
1979 Yamaha QT50 Yamahopper
0400 YZ400E (MX Racer)
0400 XS400E, XS400-2E
0500 XT500E (Dual Purpose)
0500 SR500E (Street)
0500 XS500E (Street)
0650 XS650E, XS650SE
0750 XS750E, XS750SE
1100 XS1100E (Street)
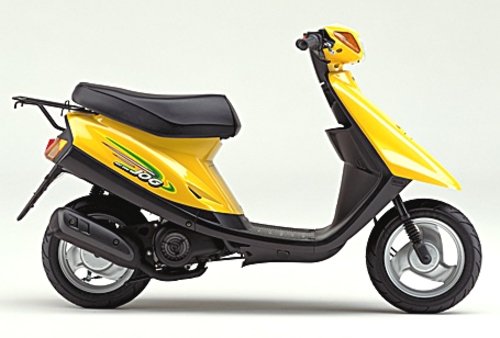
In 1979 the Yamahopper QT50 was introduced. Here is a excellent article about the cutie on mopedarmy.com. Here is the QT50 Service Manual at QT50.net. That is where “all” QT50 info, love and links are kept.
The Yamaha QT50 is the same design as Honda NC50 and Suzuki FA50. All three ultralights are similar, zippy, well made, and easy to ride.
1979 Yamaha QT50 Yamahopper
1979 Yamaha (suffix F)
0050 QT50F Yamahopper (2-stroke Street)
0050 LB50-PF Chappy (2-stroke Street)
0080 GT80F (Dual Purpose)
0080 GTMXF (Motocross)
0080 YZ80F (MX Racer)
0100 DT100F (Dual Purpose)
0100 YZ100F (MX Racer)
0100 MX100F (Motocross)
0125 YZ125F (MX Racer)
0125 DT125F (Dual Purpose)
0175 IT175F(Off Road)
0175 MX175F (Motocross)
0250 DT250F (Dual Purpose)
0250 YZ250F (MX Racer)
0250 IT250F (Off Road)
0250 TZ250F (Road Racer)
0400 XS400F , XS400-2F
0400 RD400F (Street)
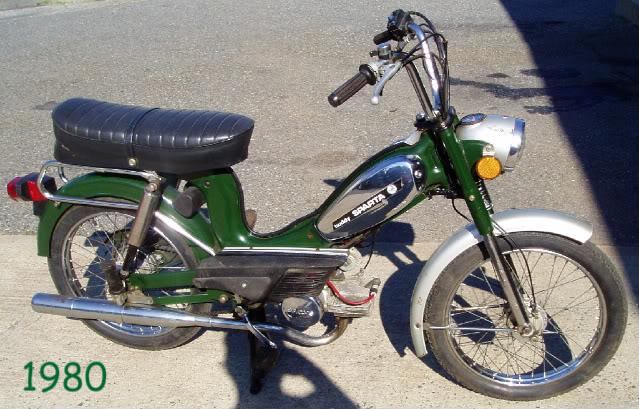
1980 Yamaha LC50 Champ
0400 IT400F (Off Road)
0400 YZ400F (MX Racer)
0500 TT500F (Off Road)
0500 SR500F (Street)
0650 XS650F, XS650SF, XS650-2F
0750 XS750F, XS750SF
1100 XS1100F (Street)
In 1980 only, Yamaha sold the LC50 Champ. It was like a QT50 with fat tires. Here is more about the Yamaha LC50
1980 Yamaha (suffix G)
0050 QT50G Yamahopper (2-stroke Street)
0050 QT50-2G Yamahopper (2-stroke Street)
0050 LB50-PG Chappy (2-stroke Street)
0050 LC50G Champ (2-stroke Street)
0080 GT80G (Dual Purpose)
0080 YZ80G (MX Racer)
0080 MX80G (Motocross)

1980 Yamaha QT50 Yamahopper
0100 DT100G (Dual Purpose)
0100 YZ100G (MX Racer)
0100 MX100G (Motocross)
0125 IT125G (Off Road)
0125 YZ125G (MX Racer)
0125 DT125G (Dual Purpose)
0125 TZ125G (Road Racer)
0175 IT175G (Off Road)
0175 MX175G (Motocross)
0175 DT175G (Dual Purpose)
0250 YZ250G (MX Racer)
0250 IT250G (Off Road)
0250 SR250G (Street)
0250 TT250G (Off Road)
0250 XT250G (Dual Purpose)
0250 TZ250G (Road Racer)
0400 XS400G, XS400SG
0425 IT425G (Off Road)
0400 YZ465G (MX Racer)
0500 TT500G (Off Road)
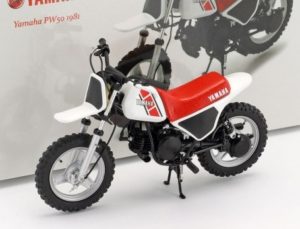
1981 Yamaha PW50 Y-Zinger
0500 XT500G (Dual Purpose)
0500 SR500G (Street)
0650 XJ650G Maxim (Street)
0650 XS650G, XS650SG
0850 XS850G, XS850SG
1100 XS1100G, XS1100SG, XS1100LG
New for 1981 is the little kids Yamaha. The PW50 Y-Zinger has the same engine and shaft-drive as QT50. That’s right, shaft drive! These are the only (common) 50cc motorcycles with shaft drive.
1981 Yamaha (suffix H)
0050 QT50H Yamahopper (2-stroke Street)
0050 LB50PH Chappy (2-stroke Street)
0050 PW50H Y-Zinger
0060 YZ60H (MX Racer)
0080 YZ80H (MX Racer)
1981 Yamaha QT50 Yamahopper
0080 MX80H (Motocross)
0180 DT80H (Dual Purpose)
0100 DT100H (Dual Purpose)
0100 YZ100H (MX Racer)
0100 MX100H (Motocross)
0125 IT125H (Off Road)
0125 YZ125H (MX Racer)
0125 DT125H (Dual Purpose)
0175 IT175H (Off Road)
0175 MX175H (Motocross)
0175 DT175H (Dual Purpose)
0185 SR185H (Street)
0250 YZ250H (MX Racer)
0250 IT250H (Off Road)
0250 SR250H (Street)
0250 TT250H (Off Road)
0250 XT250H (Dual Purpose)
0400 XS400H, XS400SH
0465 IT465H (Off Road)
0400 YZ465H (MX Racer)
0500 TT500H (Off Road)
0500 XT500H (Dual Purpose)
0500 SR500H (Street)
0550 XJ550H (Street)
0650 XS650H, XS650SH
0650 XJ650H Maxim (Street)
0750 XJ750H Maxim (Street)
0750 XV750H Virago (Cruiser)
0850 XS850H, XS850SH
0920 XV920H Virago (Cruiser)

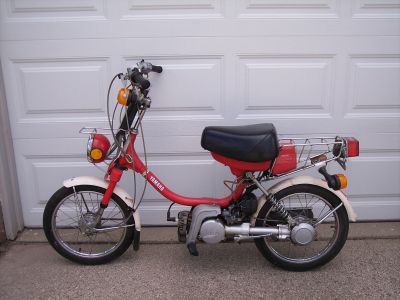
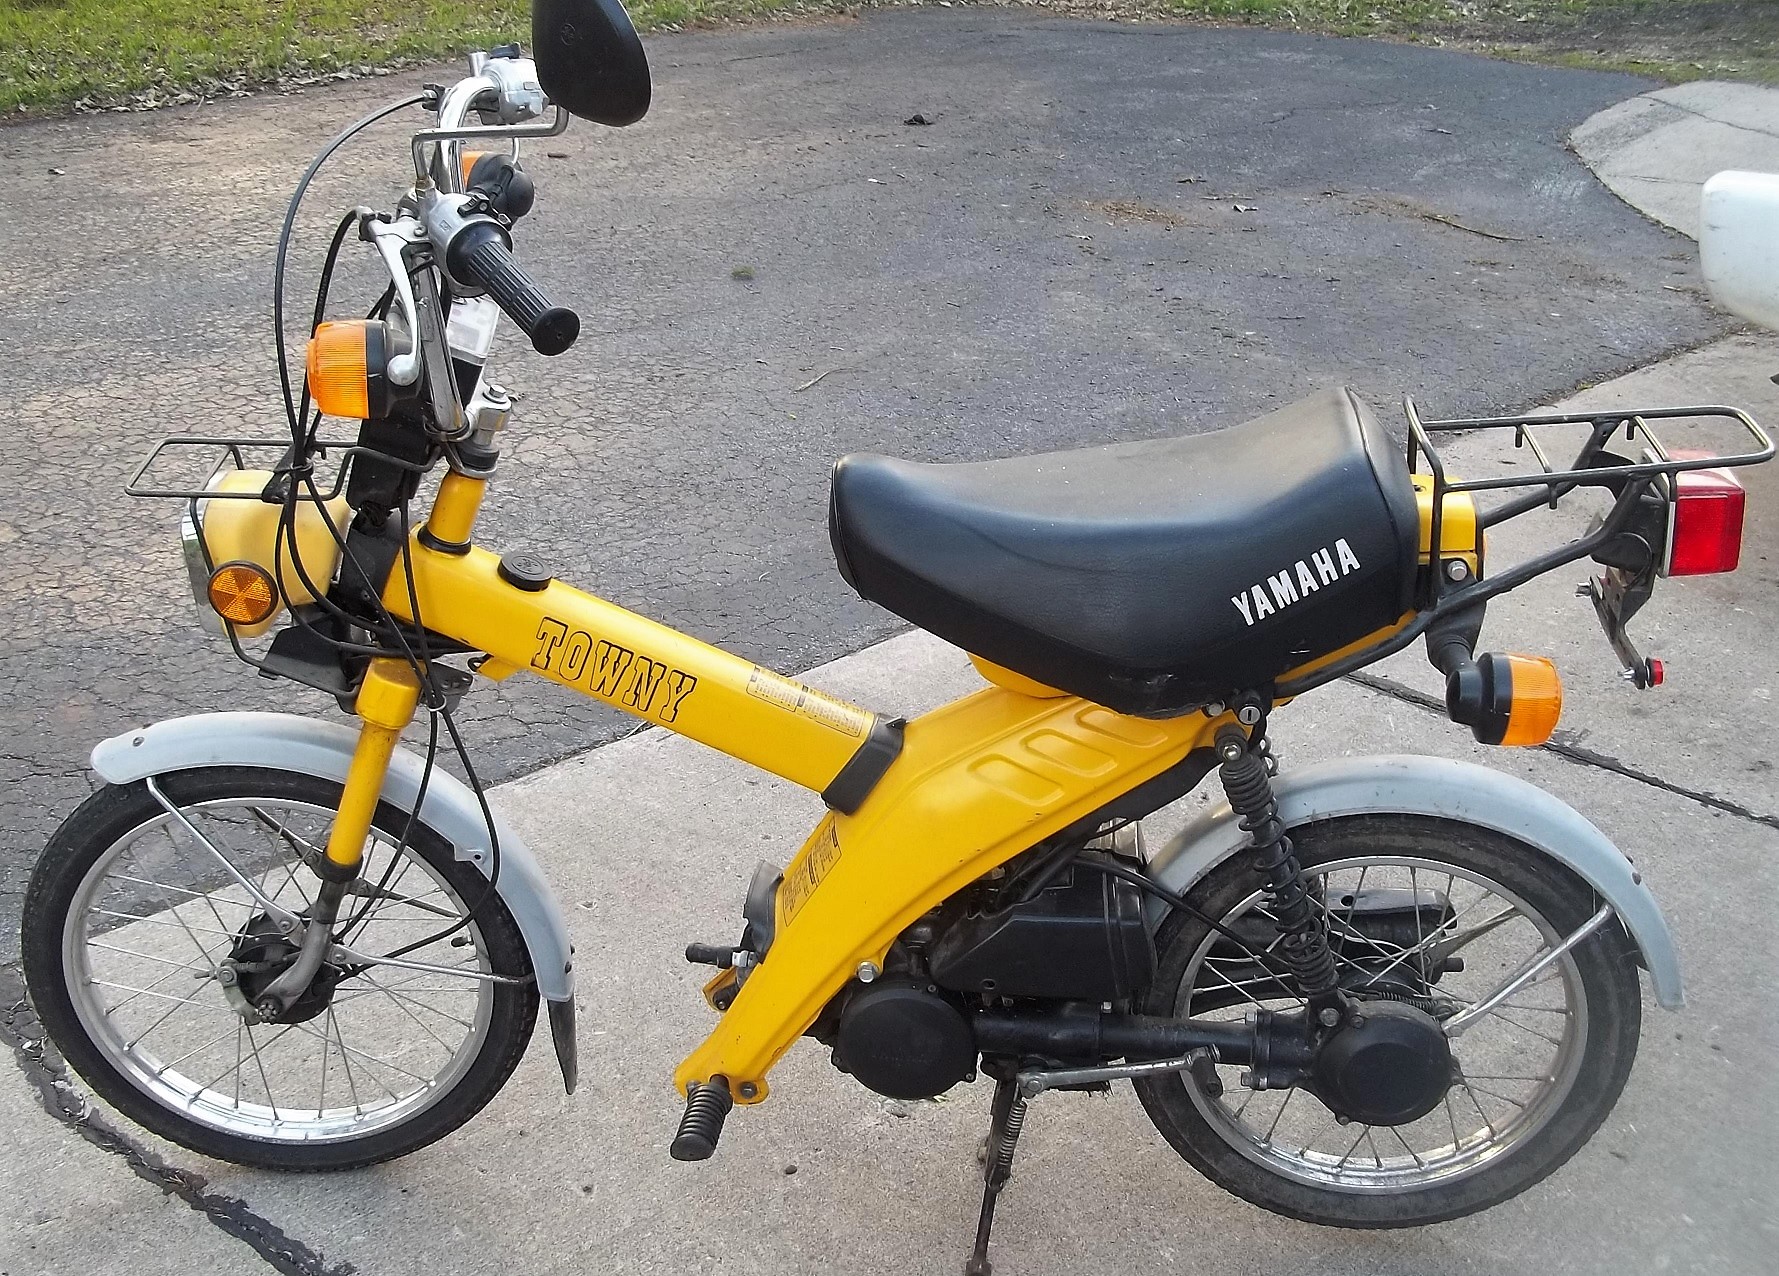
1982 Yamaha MJ50 Towny
1982 Yamaha (suffix J)
0050 QT50J Yamahopper (2-stroke Street)
0050 LB50PJ Chappy (2-stroke Street)
0050 MJ50J Towny (2s S) tires 2.00-16, 2.25-14
0050 PW50J Y-Zinger
0050 MX50J (Off Road)
0060 YZ60J (MX Racer)
0080 YZ80J Motocross (MX Racer)
0080 MX80J (Off Road)
0180 DT80J (Dual Purpose)
0100 DT100J (Dual Purpose)
0100 YZ100J Motocross (MX Racer)
0125 XT125J (Dual Purpose)
0125 YZ125J (MX Racer)
0175 IT175J (Off Road)
0185 SR185J (Street)
0200 XT200J (Dual Purpose)
0250 YZ250J Motocross (MX Racer)
0250 IT250J (Off Road)
1982 Yamaha LB50P Chappy
0250 TZ250J (Road Racer)
0250 SR250J (Street)
0250 TT250J (Off Road)
0250 XT250J (Dual Purpose)
0400 XS400J, XS400RJ (Street)
0465 IT465J (Off Road)
0490 YZ490J Motocross (MX Racer)
0550 XT550J (Dual Purpose)
0550 XZ550RJ Vision (Street)
0550 XJ550J Maxim (Street)
0550 XJ550RJ Seca (Street)
0650 XS650SJ Special (Street)
0650 XJ650J Maxim (Street)
0650 XJ650RJ Seca (Street)
0750 XJ750J Maxim (Street)
0750 XJ750RJ Seca (Street)
0750 XV750J Virago (Cruiser)
0920 XV920J Virago (Cruiser)
0920 XV920RJ (Street)
1983 Yamaha QT50 Yamahopper
1983 Yamaha (suffix K, California version KC)
0050 QT50K Yamahopper (2-stroke Street)
0050 PW50K Y-Zinger (Off Road)
0050 RX50K Special (2-stroke Street)
0050 CA50K Riva 50 (Scooter)
0060 YZ60K Motocross (MX Racer)
0080 PW80K Y-Zinger (Off Road)
0080 CV80K Riva 80 (Scooter)
0080 YZ80K Motocross (MX Racer)
0100 DT100K (Dual Purpose)
0100 YZ100K Motocross (MX Racer)
0125 XT125K, XT125KC (Dual Purpose)
0125 YZ125K Motocross (MX Racer)
0175 IT175K (Off Road)
0180 XC180K, XC180KC Riva 180 (Scooter)
0180 XC180ZK, XC180ZKC Riva 180 (Scooter)
0200 XT200K, XT200KC (Dual Purpose)
0250 YZ250K Motocross (MX Racer)
0250 IT250K (Off Road)
0250 XT250K, XT250KC (Dual Purpose)
0400 XS400K, XS400RK (Street)
0490 IT490K (Off Road)
0490 YZ490K Motocross (MX Racer)
0500 XV500K Virago (Cruiser)
0550 XT550K (Dual Purpose)
0550 XZ550RK Vision (Street)
0550 XJ550RK Seca (Street)
0600 TT600K (Off Road)
0650 XS650K Special (Street)
0650 XJ650K Maxim (Street)
0650 XJ650RK Seca (Street)
0750 XJ750K Maxim (Street)
0750 XJ750RK Seca (Street)
0750 XJ750MK Midnight Maxim (Street)
0750 XV750MK Midnight Virago (Cruiser)
0900 XJ900RK Seca (Street)
0920 XV920K Virago (Cruiser)
0920 XV920MK Midnight Virago (Cruiser)
1200 XVZ12TK Venture (Touring)
1200 XVZ12TDK Venture Royale (Touring)
1984 Yamaha RX50 Special
1984 Yamaha (suffix L, California version LC)
0050 QT50L Yamahopper (2-stroke Street)
0050 RX50L Special (2-stroke Street)
0050 CA50L Riva 50 (Scooter)
0080 CV80L Riva 80 (Scooter)
0080 YZ80L Motocross (MX Racer)
0125 YZ125L Motocross (MX Racer)
0180 XC180L, XC180LC Riva 180 (Scooter)
0180 XC180ZL, XC180ZLC Riva 180 (Scooter)
0200 IT200L (Off Road)
0250 YZ250L Motocross (MX Racer)
0250 XT250L, XT250LC (Dual Purpose)
0350 RZ350L (2-stroke Street)
0490 IT490L (Off Road)
0490 YZ490L Motocross (MX Racer)
0600 XT600L, XT600LC (Dual Purpose)
0600 FJ600L, FJ600LC (Sport Street)
0600 TT600L (Off Road)
0700 XV700L, XV700LC Virago (Cruiser)
1000 XV1000L, XV1000LC Virago (Cruiser)
1100 FJ1100L, FJ1100LC (Sport Street)
1200 XVZ12L, XVZ12LC Venture (Touring)
1200 XVZ12DL, XVZ12DLC Venture Royale (Touring)
1985 Yamaha CA50 Riva
1985 Yamaha (suffix N, California version NC)
0050 QT50N Yamahopper (2-stroke Street)
0050 PW50N Y-Zinger (Off Road)
0050 CA50N Riva 50 (Scooter)
0080 CV80N Riva 80 (Scooter)
0080 PW80N Y-Zinger (Off Road)
0080 YZ80N Motocross (MX Racer)
0125 YZ125N Motocross (MX Racer)
0125 XC125N, XC125NC Riva 125 (Scooter)
0180 XC180N, XC180NC Riva 180 (Scooter)
0180 XC180ZN, XC180ZNC Riva 180 Midnight
0180 XC180DN, XC180DNC Riva 180 Deluxe
0200 IT200N (Off Road)
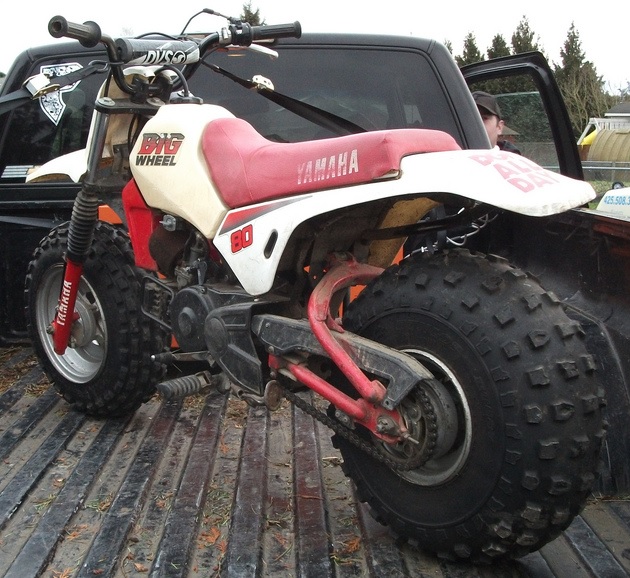
0200 BW200N Big Wheel (Off Road)
0250 YZ250N Motocross (MX Racer)
0350 XT350N, XT350NC (Dual Purpose)
0350 RZ350N (2-stroke Street)
0350 TY350N Trials (Trials)
0350 RZ350NC, RZ350NCII (2-stroke Street)
0490 YZ490N Motocross (MX Racer)
0600 XT600N, XT600NC (Dual Purpose)
0600 FJ600N, FJ600NC (Sport Street)
0600 TT600N (Off Road)
0700 XV700N, XV700NC Virago (Cruiser)
0700 XJ700N, XJ700NC Maxim (Street)
0700 XJ700XN, XJ700XNC Maxim X (Street)
0750 FZ750N (Sport Street)
1000 XV1000N, XV1000NC Virago (Cruiser)
1100 FJ1100N, FJ1100NC (Sport Street)
1200 VMX12N, VMX12NC V-Max (Street)
1200 XVZ12DN, XVZ12DNC Venture Royale (Touring)
1986 Yamaha BW80
1986 Yamaha (suffix S, California version SC)
0050 QT50S Yamahopper (2-stroke Street)
0050 PW50S Y-Zinger (Off Road)
0050 CA50S Riva 50 (Scooter)
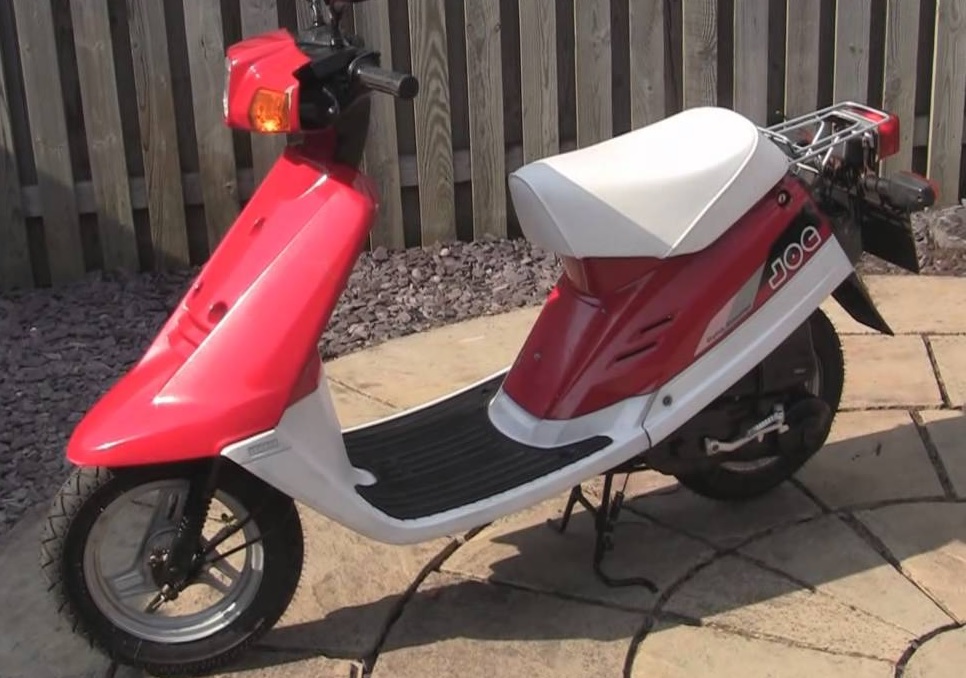
0050 CE50ES Jog (Scooter)
0080 CV80S Riva 80 (Scooter)
0080 YZ80S Motocross (MX Racer)
0080 BW80S Big Wheel (Off Road)
0125 YZ125S Motocross (MX Racer)
0125 XC125S, XC125SC Riva 125 (Scooter)
0125 XC125ZS, XC125ZSC Riva 125 Midnight
0200 IT200S (Off Road)
0200 BW200S, BW200ES Big Wheel (Off Road)
0225 TT225S (Off Road)
0250 YZ250S Motocross (MX Racer)
0350 XT350S, XT350SC (Dual Purpose)
0350 TT350S (Off Road)
0350 TY350S Trials (Trials)
0490 YZ490S Motocross (MX Racer)
0600 XT600S, XT600SC (Dual Purpose)
0600 FZ600S, FZ600SC (Sport Street)
0600 YX600S, YX600SC Radian (Street)
0600 SRX600S, SRX600SC (Street)
0600 TT600S (Off Road)
0700 XV700CS, XV700CSC Virago (Cruiser)
0700 XV700SS, XV700SSC Virago (Cruiser)
0700 XJ700S, XJ700SC Maxim (Street)
0700 XJ700XS, XJ700XSC Maxim X (Street)
0700 FZX700S, FZX700SC Fazer (Sport Street)
0750 FZ750S, FZ750SC (Sport Street)
1100 XV1100S, XV1100SC Virago (Cruiser)
1200 FJ1200S, FJ1200SC (Sport Street)
1200 VMX12S, VMX12SC V-Max (Street)
1300 XVZ13DS, XVZ13DSC Venture Royale (Touring)

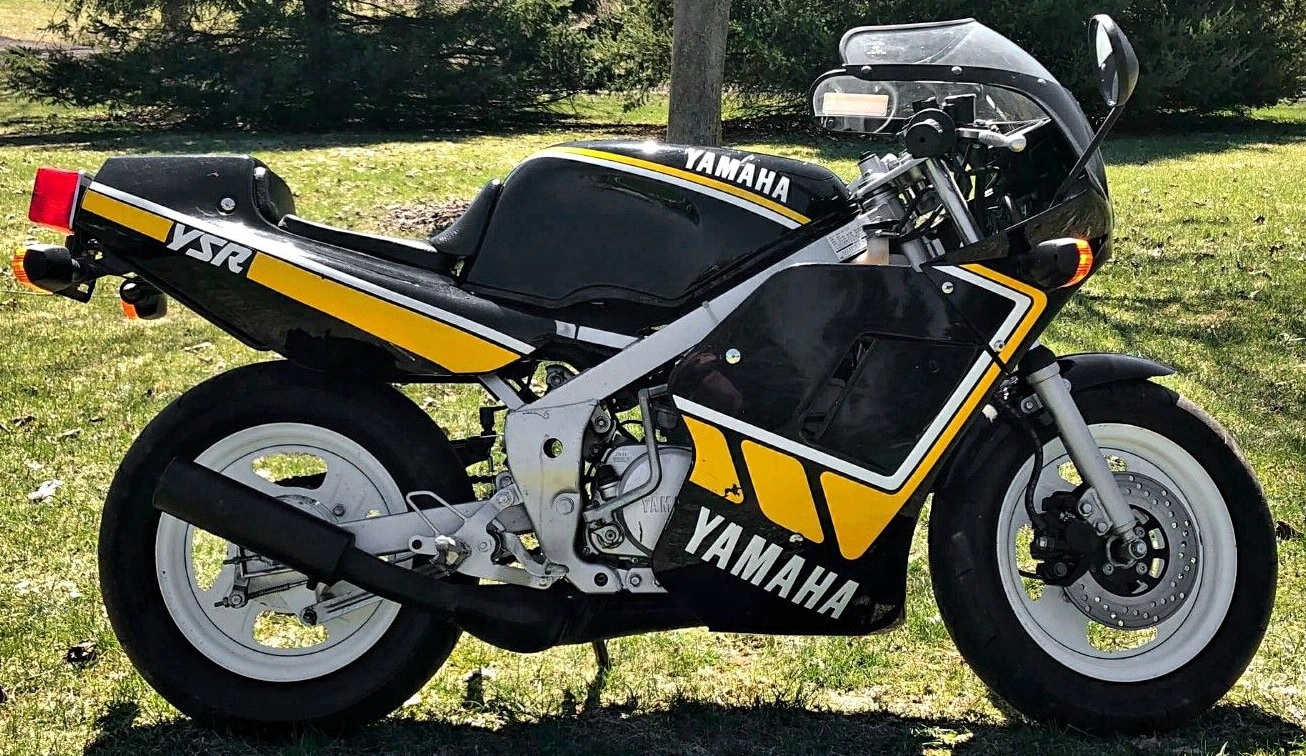
1987 Yamaha YSR50
1987 Yamaha (suffix T, California version TC)
0050 QT50T Yamahopper (2-stroke Street)
0050 PW50T Y-Zinger (Off Road)
0050 YSR50T (2-stroke Street)
0050 SH50T, SH50ET Razz (Scooter)
0050 SH50EMT Razz Midnight (Scooter)
0050 CE50ET Jog (Scooter)
0080 CV80T Riva 80 (Scooter)
0080 YZ80T Motocross (MX Racer)
0080 BW80T Big Wheel (Off Road)
0125 YZ125T Motocross (MX Racer)
0125 XC125T, XC125TC Riva 125 (Scooter)
0125 XC125ZT, XC125ZTC Riva 125 Midnight
0200 XC200T, XC200TC Riva 200 (Scooter)
0200 XC200ZT, XC200ZTC Riva 200 Midnight
0200 BW200ET Big Wheel (Off Road)
1987 Yamaha CE50 Jog
0200 TW200T, TW200TC Trailway (Dual Purpose)
0225 TT225T (Off Road)
0250 YZ250T Motocross (MX Racer)
0350 XT350T, XT350TC (Dual Purpose)
0350 SRX350T, SRX350TC (Street)
0350 BW350T Big Wheel (Off Road)
0350 TT350T (Off Road)
0490 YZ490T Motocross (MX Racer)
0535 XV535T, XV535TC Virago (Cruiser)
0600 XT600T, XT600TC (Dual Purpose)
0600 FZ600T, FZ600TC (Sport Street)
0600 YX600T, YX600TC Radian (Street)
0700 XV700CT, XV700CTC Virago (Cruiser)
0700 FZX700T, FZX700TC Fazer (Sport Street)
0700 FZ700T, FZ700TC (Sport Street)
0750 FZR750RT (Sport Street)
1000 FZR1000T, FZR1000TC (Sport Street)
1200 FJ1200T, FJ1200TC (Sport Street)
1300 XVZ13T, XVZ13TC Venture (Touring)
1300 XVZ13DT, XVZ13DTC Venture Royale (Touring)

1988 Yamaha DT50
1988 Yamaha (suffix U, California version UC)
0050 DT50U (2-stroke Street)
0050 YSR50U (2-stroke Street)
0050 SH50U Razz (Scooter)
0050 SH50MU Razz Midnight (Scooter)
0050 CG50EU Jog (Scooter)
0080 CV80U Riva 80 (Scooter)
0080 YZ80U Motocross (MX Racer)
0080 BW80U Big Wheel (Off Road)
0125 YZ125U Motocross (MX Racer)
0125 XC125U Riva 125 (Scooter)
0125 XC125ZU Riva 125 Midnight
0200 XC200U Riva 200 (Scooter)
0200 XC200ZU Riva 200 Midnight
0200 BW200EU Big Wheel (Off Road)
0250 YZ250U Motocross (MX Racer)
0350 XT350U, XT350UC (Dual Purpose)
0350 BW350U Big Wheel (Off Road)
0400 FZR400U, FZR400UC (Sport Street)

1988 Yamaha CG50 Jog
0490 YZ490U Motocross (MX Racer)
0535 XV535U XV535UC Virago (Cruiser)
0600 XT600U, XT600UC (Dual Purpose)
0600 FZ600U, FZ600UC (Sport Street)
0600 YX600U, YX600UC Radian (Street)
0700 XV700U, XV700UC Virago (Cruiser)
0750 FZ750U, FZ750UC (Sport Street)
0750 FZR750RU (Sport Street)
1000 FZR1000U, FZR1000UC (Sport Street)
1300 XVZ13U, XVZ13UC Venture (Touring)
1989 Yamaha (suffix W, California version WC)
0050 DT50W (2-stroke Street)
0050 YSR50W (2-stroke Street)
0050 SH50W Razz (Scooter)
0050 SH50MW Razz Midnight (Scooter)
0050 CG50W Jog (Scooter)
0050 CW50W Zuma (Scooter)
0080 YZ80W Motocross (MX Racer)
0125 YZ125W Motocross (MX Racer)
0125 XC125W Riva 125 (Scooter)
0125 XC125ZW Riva 125 Midnight
0200 XC200W Riva 200 (Scooter)
0200 XC200ZW Riva 200 Midnight
0250 YZ250W, YZ250WRW (MX Racer)
0250 XV250W, XV250WC Route 66 (Cruiser)
0350 XT350W, XT350WC (Dual Purpose)
0400 FZR400W, FZR400WC (Sport Street)
0490 YZ490W Motocross (MX Racer)
0600 XT600W, XT600WC (Dual Purpose)
0600 FZR600W, FZR600WC (Sport Street)
0600 YX600W, YX600WC Radian (Street)
0750 XV750W, XV750WC Virago (Cruiser)
1000 FZR1000W, FZR1000WC (Sport Street)
1000 XV1100W, XV1100WC Virago (Cruiser)
1200 FJ1200W, FJ1200WC (Sport Street)
1200 VMX1200W, VMX1200WC V-Max (Street)
1300 XVZ13DW, XVZ13DWC Venture Royale (Touring)
1990 Yamaha (suffix A, California version AC)
0050 DT50A (2-stroke Street)
0050 YSR50A (2-stroke Street)
0050 PW50A Y-Zinger (Off Road)
0050 SH50A Razz (Scooter)
0050 SH50MA Razz Midnight (Scooter)
0050 CG50A Jog (Scooter)
0050 CW50TA Zuma (Scooter)
0080 YZ80A Motocross (MX Racer)
0080 BW80A Big Wheel (Off Road)
0100 RT100A Off Road (Off Road)
0125 YZ125A Motocross (MX Racer)
0125 XC125ZA Riva 125 Midnight
0180 RT180A Off Road (Off Road)
0200 XC200ZA Riva 200 Midnight
0200 TW200A, TW200AC Trailway (Dual Purpose)
0250 YZ250A, YZ250WRW (MX Racer)
0250 XV250A, XV250AC Route 66 (Cruiser)
0350 XT350A, XT350AC (Dual Purpose)
0400 FZR400A, FZR400AC (Sport Street)
0490 YZ490A Motocross (MX Racer)
0535 XV535A, XV535AC Virago (Cruiser)
0600 XT600A, XT600AC (Dual Purpose)
0600 FZR600RA, FZR600AC (Sport Street)
0600 YX600A, YX600AC Radian (Street)
0750 XV750A, XV750AC Virago (Cruiser)
1000 FZR1000A, FZR1000AC (Sport Street)
1000 XV1100A, XV1100AC Virago (Cruiser)
1200 FJ1200A, FJ1200AC (Sport Street)
1200 VMX1200A, VMX1200AC V-Max (Street)
1300 XVZ13DA, XVZ13DAC Venture Royale (Touring)
1991 Yamaha YSR50
1991 Yamaha (suffix B, California version BC)
0050 YSR50B (2-stroke Street)
0050 PW50B Y-Zinger (Off Road)
0050 SH50B Razz (Scooter)
0050 CG50B Jog (Scooter)
0080 PW80B Y-Zinger (Off Road)
0080 YZ80B Motocross (MX Racer)
0125 YZ125B Motocross (MX Racer)
0125 XC125B Riva 125 (Scooter)
0180 RT180B Off Road (Off Road)
0200 XC200B Riva 200 (Scooter)
0200 TW200B, TW200BC Trailway (Dual Purpose)
0250 YZ250B Motocross (MX Racer)
0250 WR250ZB (Dual Purpose)
0350 XT350B, XT350BC (Dual Purpose)
0600 XT600EB, XT600EBC (Dual Purpose)
0600 FZR600RB, FZR600RBC (Sport Street)
0750 XV750B, XV750BC Virago (Cruiser)
1000 FZR1000B, FZR1000BC (Sport Street)
1000 XV1100B, XV1100BC Virago (Cruiser)
1200 FJ1200B, FJ1200BC (Sport Street)
1200 VMX1200B, VMX1200BC V-Max (Street)
1300 XVZ13DB, XVZ13DBC Venture Royale (Touring)
1992 Yamaha CY50 Jog
1992 Yamaha (suffix D, California version DC)
0050 YSR50D (2-stroke Street)
0050 PW50D Y-Zinger (Off Road)
0050 SH50D Razz (Scooter)
0050 SH50MD Razz Midnight (Scooter)
0050 CY50D Jog (Scooter)
0080 PW80D Y-Zinger (Off Road)
0080 YZ80D Motocross (MX Racer)
0100 RT100D Off Road (Off Road)
0125 YZ125D1 Motocross (MX Racer)
0125 XC125D Riva 125 (Scooter)
0180 RT180D Off Road (Off Road)
0200 TW200D, TW200DC Trailway (Dual Purpose)
0225 XT225D, XT225DC Serow (Dual Purpose)
0250 YZ250D1 Motocross (MX Racer)
0250 WR200RD (Dual Purpose)
0250 WR250ZD (Dual Purpose)
0350 XT350D, XT350DC (Dual Purpose)
0500 WR500ZD (Dual Purpose)
0600 XT600ED, XT600EDC (Dual Purpose)
0600 XJ600SD, XJ600SDC Seca II (Street)
0600 FZR600RD, FZR600RDC (Sport Street)
0750 XV750D, XV750DC Virago (Cruiser)
0850 TDM850D, TDM850DC (Street)
1000 FZR1000D, FZR1000DC (Sport Street)
1000 XV1100D, XV1100DC Virago (Cruiser)
1200 FJ1200D, FJ1200DC (Sport Street)
1200 FJ1200AD, FJ1200ADC (Sport Street)
1200 VMX1200D, VMX1200DC V-Max (Street)
1300 XVZ13DD, XVZ13DDC Venture Royale (Touring)
1993 Yamaha (suffix E, California version EC)
0050 PW50E Y-Zinger (Off Road)
0050 SH50E Razz (Scooter)
0050 CY50E Jog (Scooter)
0080 PW80E Y-Zinger (Off Road)
0080 YZ80E1 Motocross (MX Racer)
0100 RT100E Off Road (Off Road)
0125 YZ125E1 Motocross (MX Racer)
0125 XC125E Riva 125 (Scooter)
0180 RT180E Off Road (Off Road)
0200 TW200E, TW200EC Trailway (Dual Purpose)
0225 XT225E, XT225EC Serow (Dual Purpose)
0250 YZ250E, YZ250E1 Motocross (MX Racer)
0250 WR250ZE (Dual Purpose)
0350 XT350E, XT350EC (Dual Purpose)
0500 WR500ZE (Dual Purpose)
0535 XV535E, XV535EC Virago (Cruiser)
0600 XT600EE, XT600EEC (Dual Purpose)
0600 XJ600SE, XJ600SEC Seca II (Street)
0600 FZR600RE, FZR600REC (Sport Street)
0750 XV750E, XV750EC Virago (Cruiser)
0850 TDM850E, TDM850EC (Street)
1000 FZR1000E, FZR1000EC (Sport Street)
1000 XV1100E, XV1100EC Virago (Cruiser)
1200 FJ1200AE, FJ1200AEC (Sport Street)
1200 VMX1200E, VMX1200EC V-Max (Street)
1300 XVZ13DE, XVZ13DEC Venture Royale (Touring)
Sources:
1. Partzilla (Albany GA or Reno NV USA) https://www.partzilla.com/catalog/yamaha/motorcycle
They show and list every part for every US model Yamaha.
2. Consolidated Motor Spares (Netherlands) https://www.cmsnl.com/yamaha-motorcycle_model16707/
They show and list every part for every Yamaha world wide.
3. Jacks Scooter Shop http://www.jacksscootershop.com/scooter_models.html
They list US model Yamaha scooters. Provided some scooter model name corrections to Partzilla.
4. Google Images
Some images can contain original bikes with correct make model and year in the title. Provided visual verification and some nick names.
5. Intertec’s Vintage Collection Series (Two Stroke Motorcycles) 1990 ISBN 0-87288-386-8
Service manual for 23 brands of vintage two stroke. Provided specifications, model names, porting, tuning.
All of these sources were used to cross-check each model and year, and occasionally to make corrections. When one source disagreed with all of the others, it was was assumed to be wrong. So the info above is as correct as possible, but there still could be some errors or omissions.

 “Mofa” is short for motorisertes fahrrad (motorized bicycle).
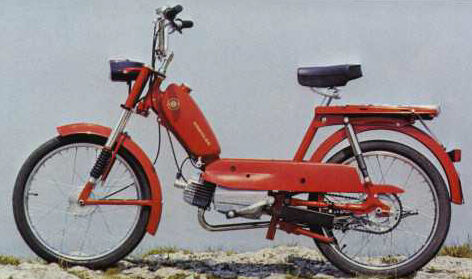
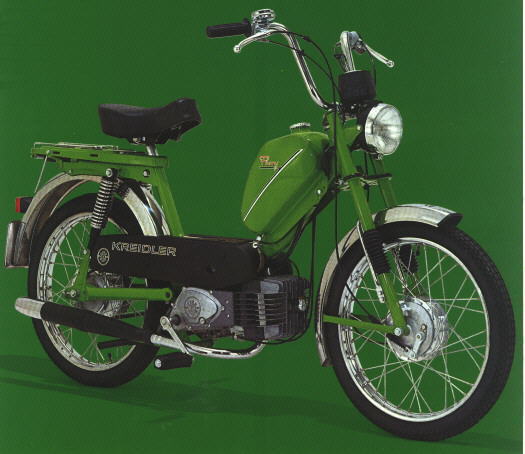
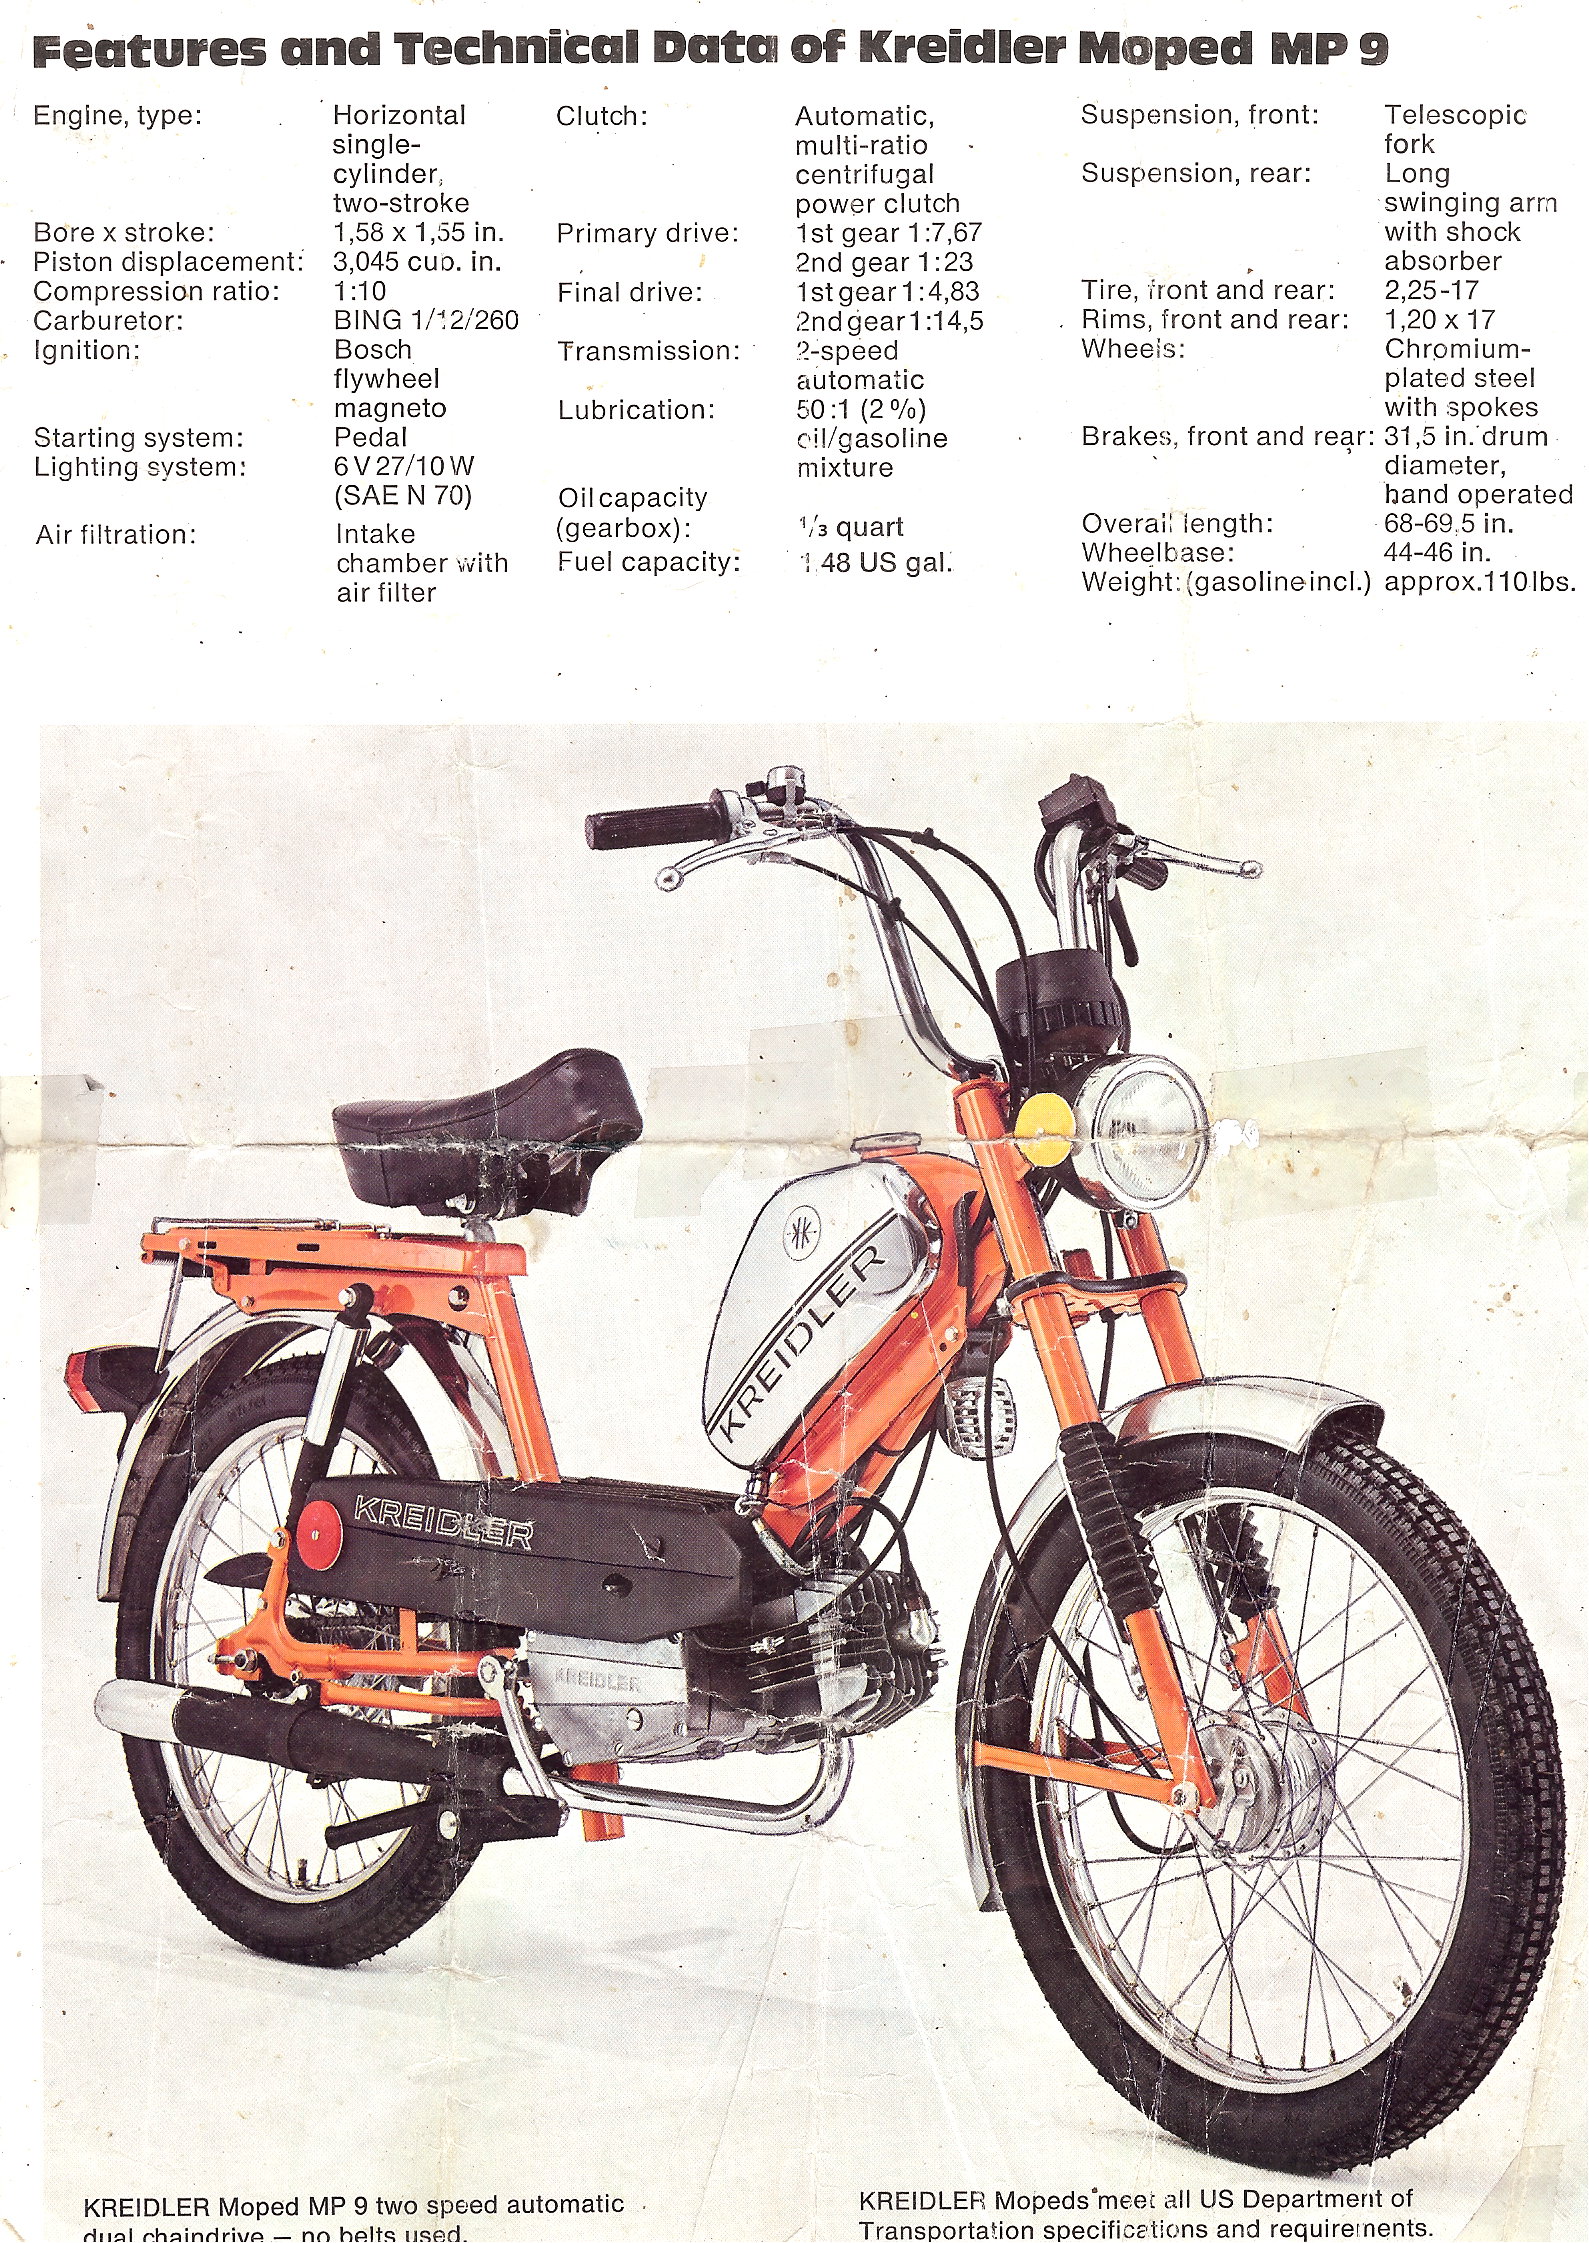
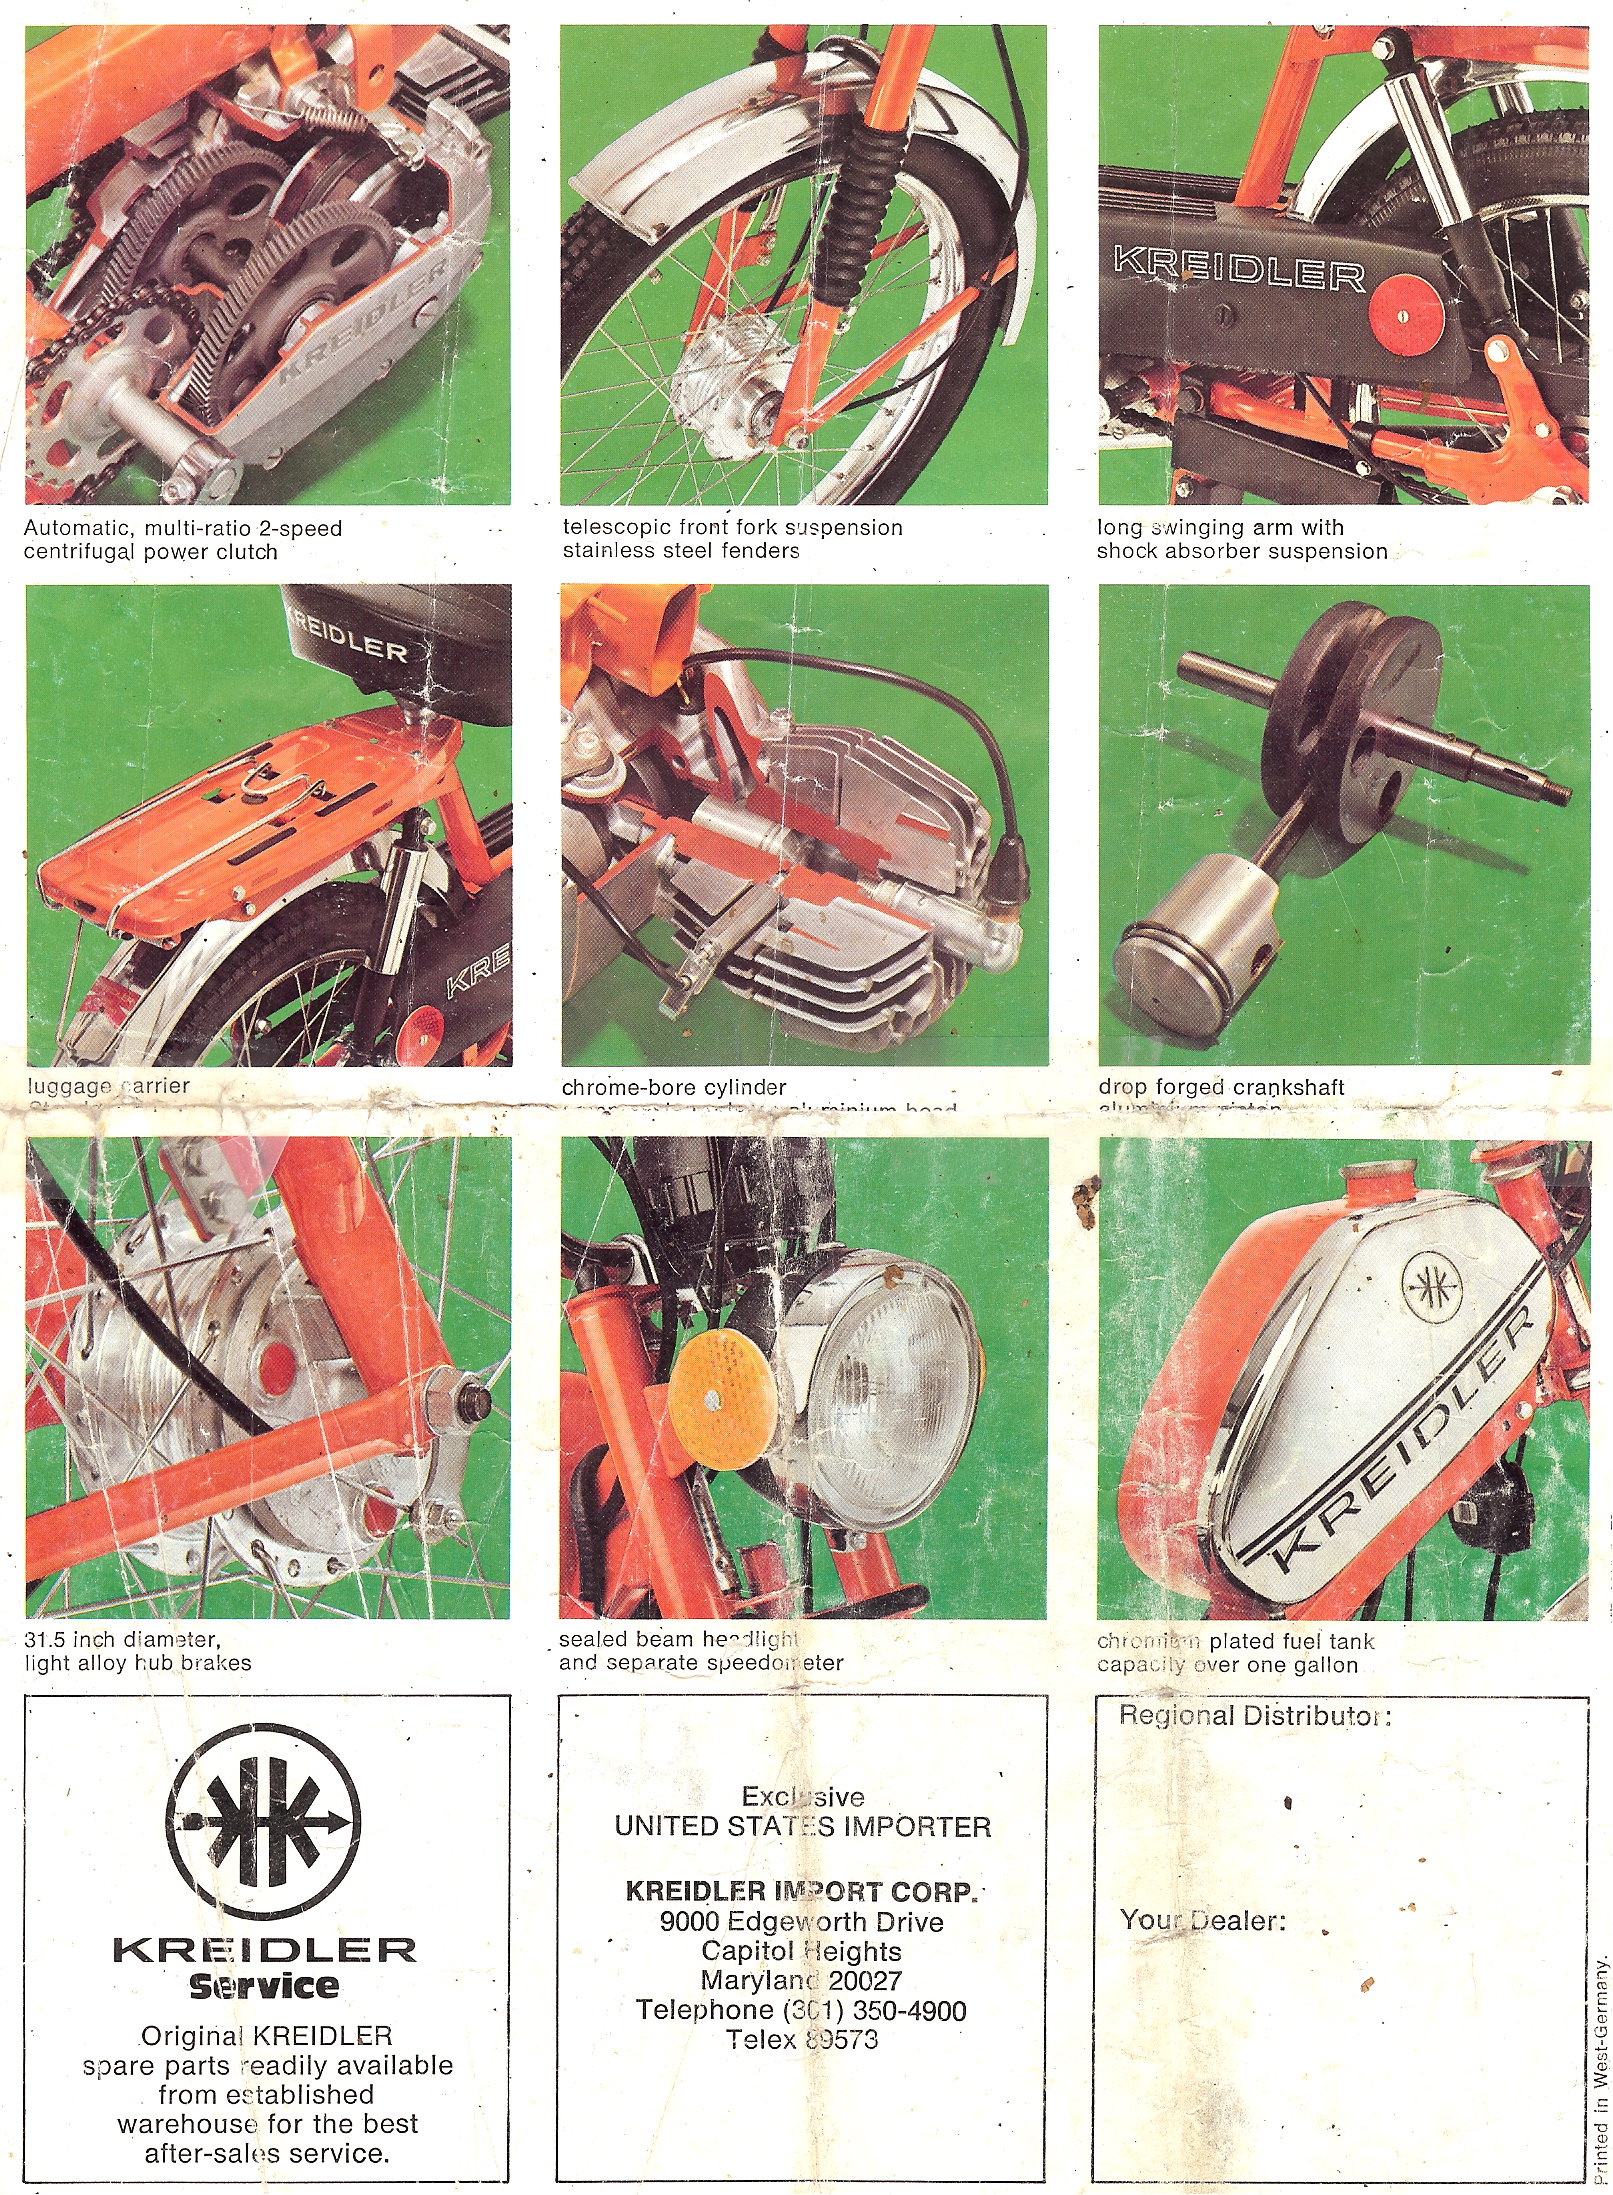
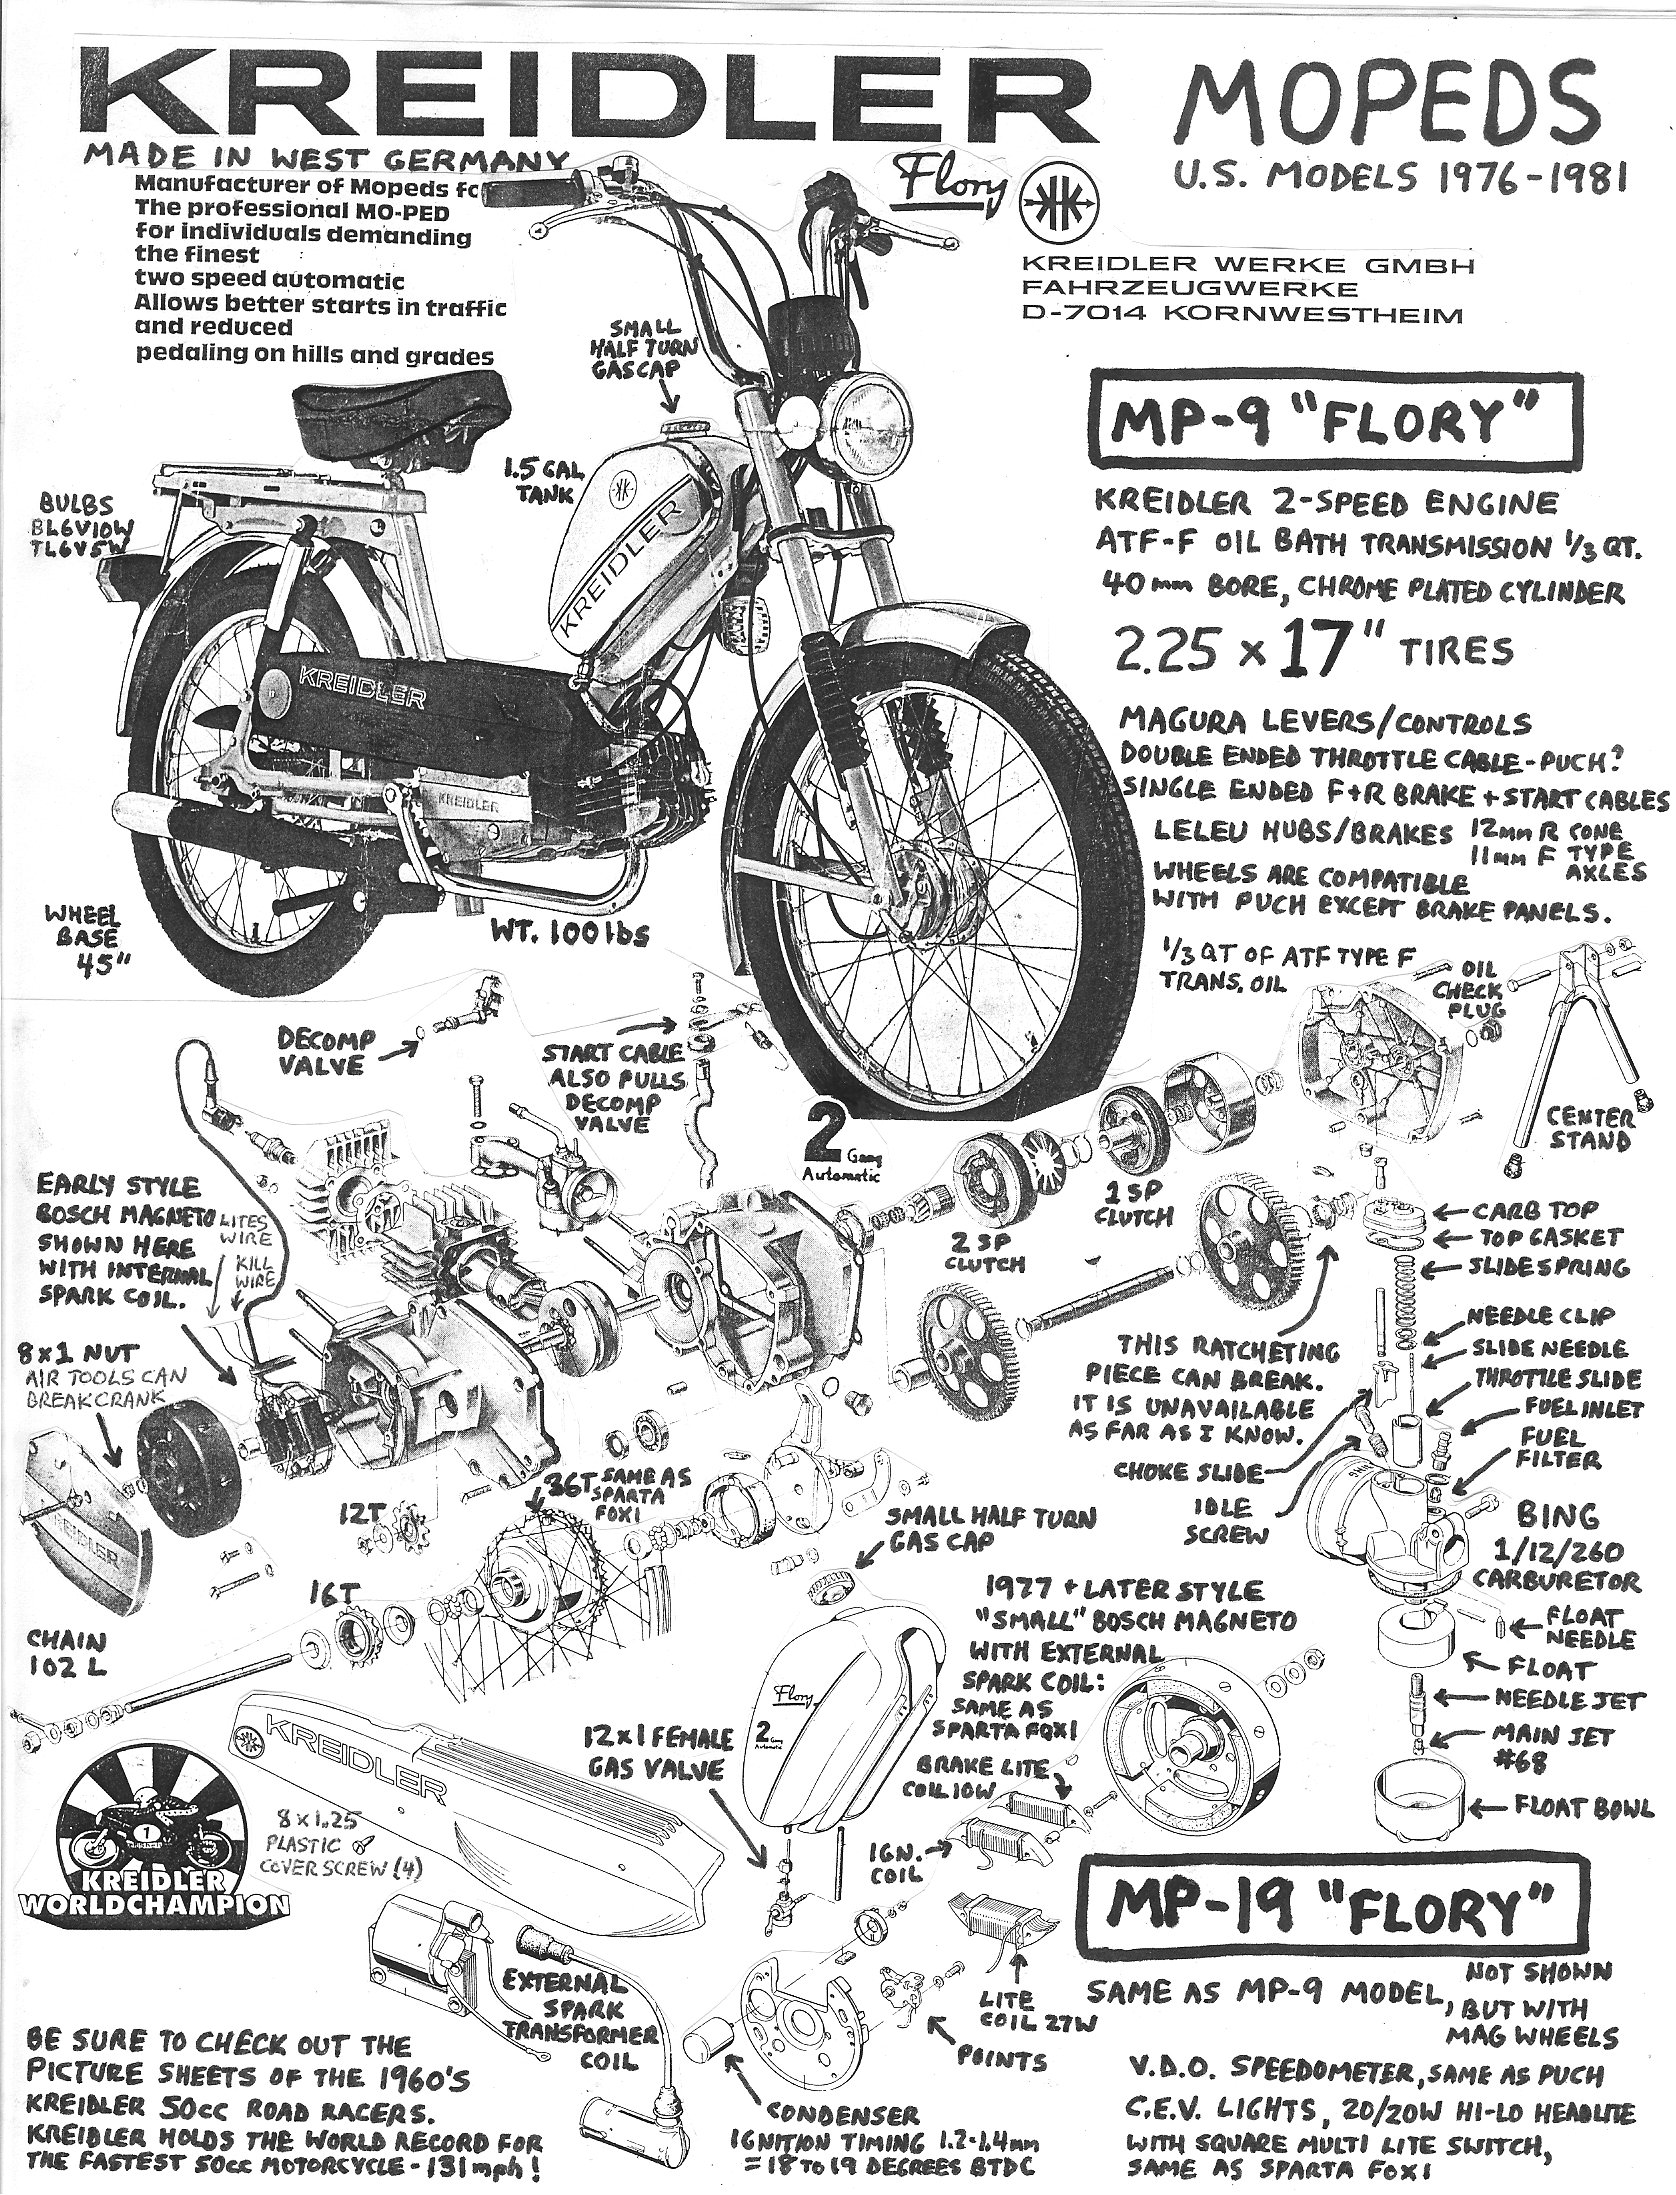
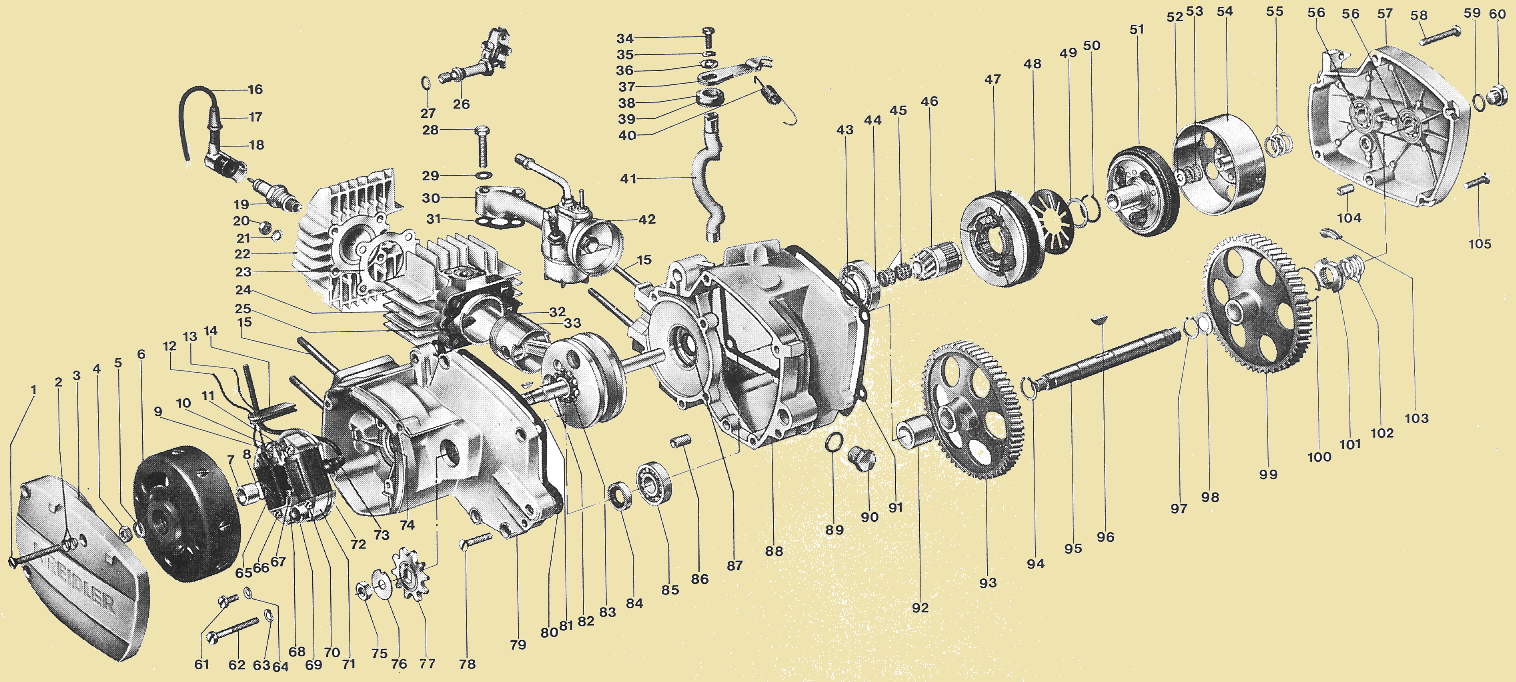
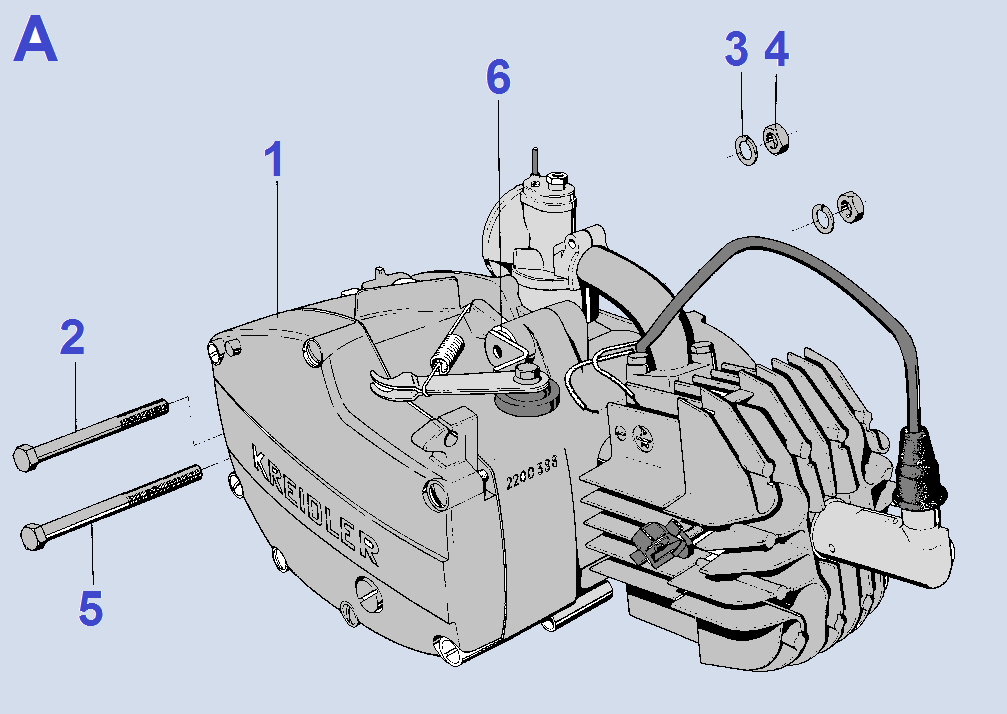
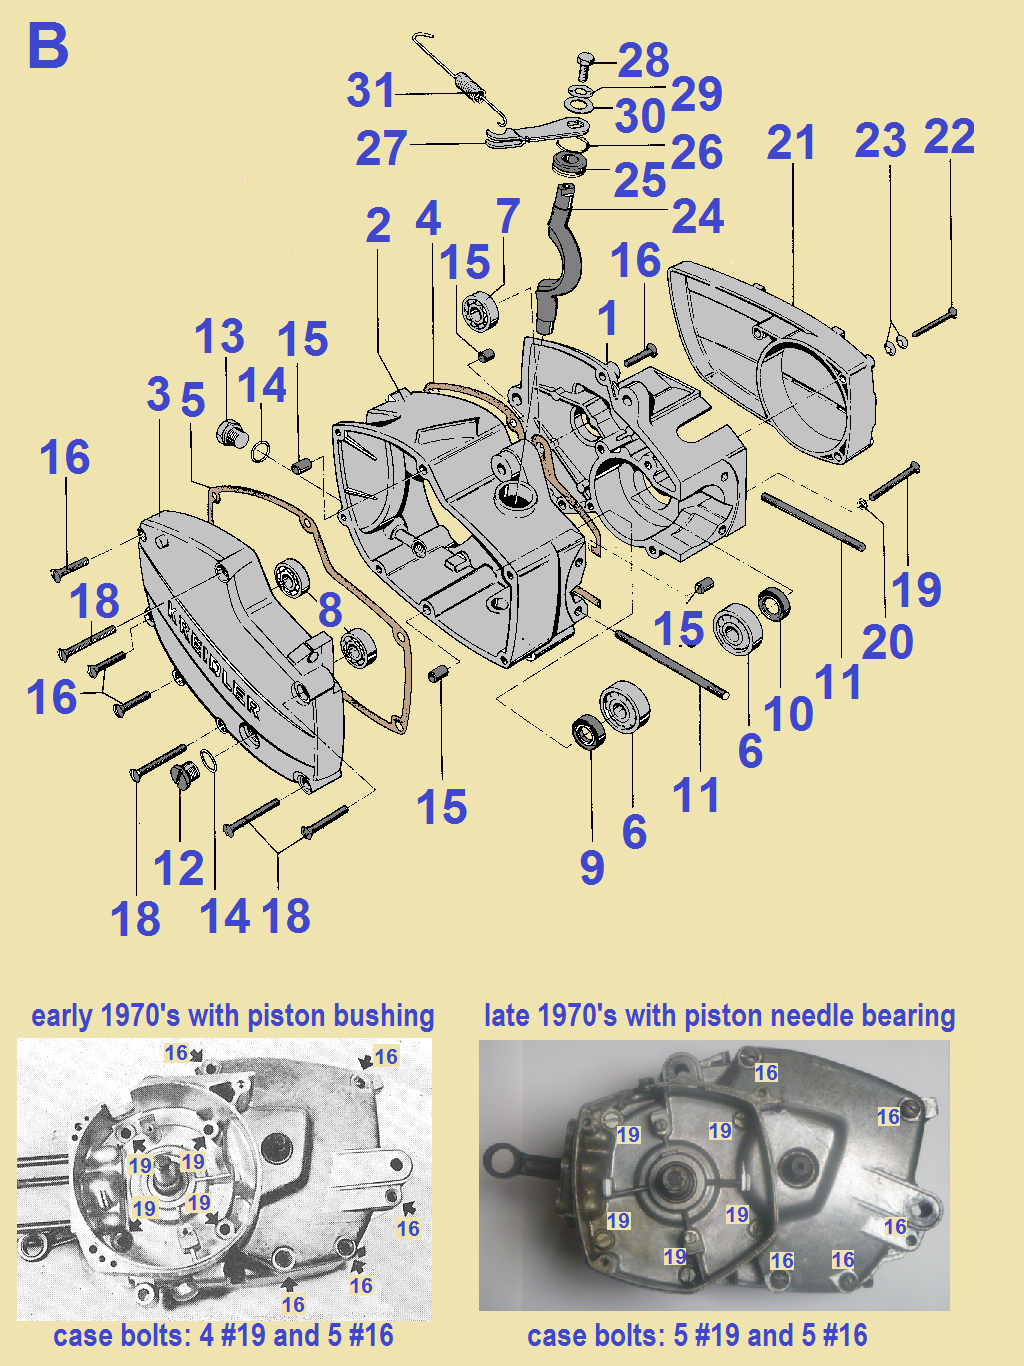
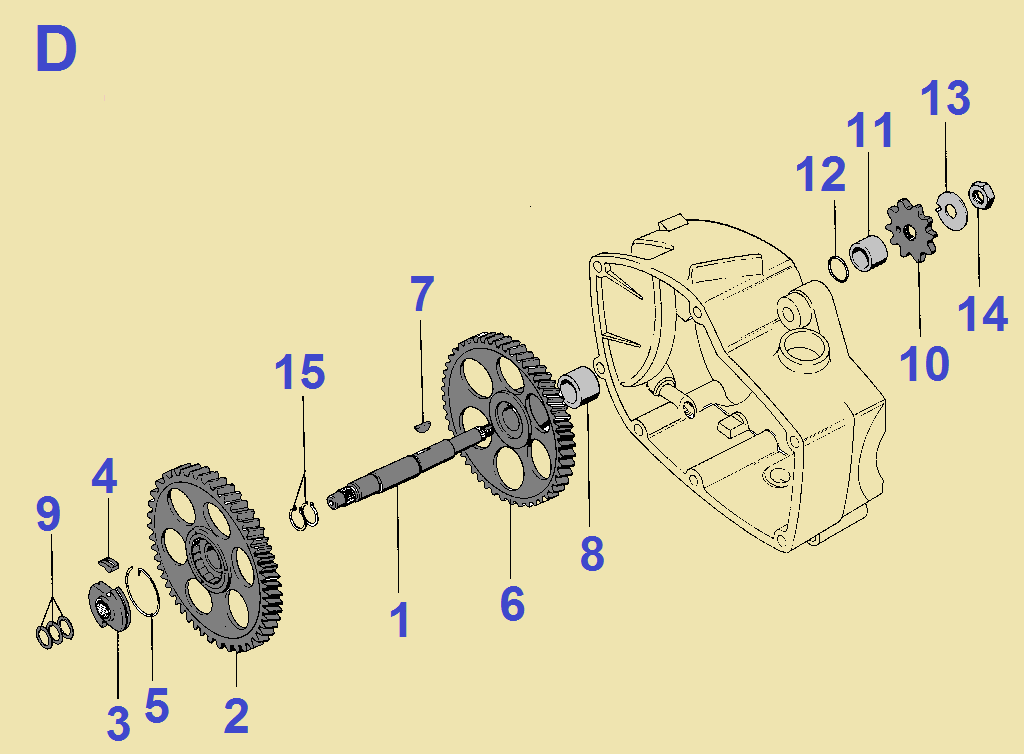
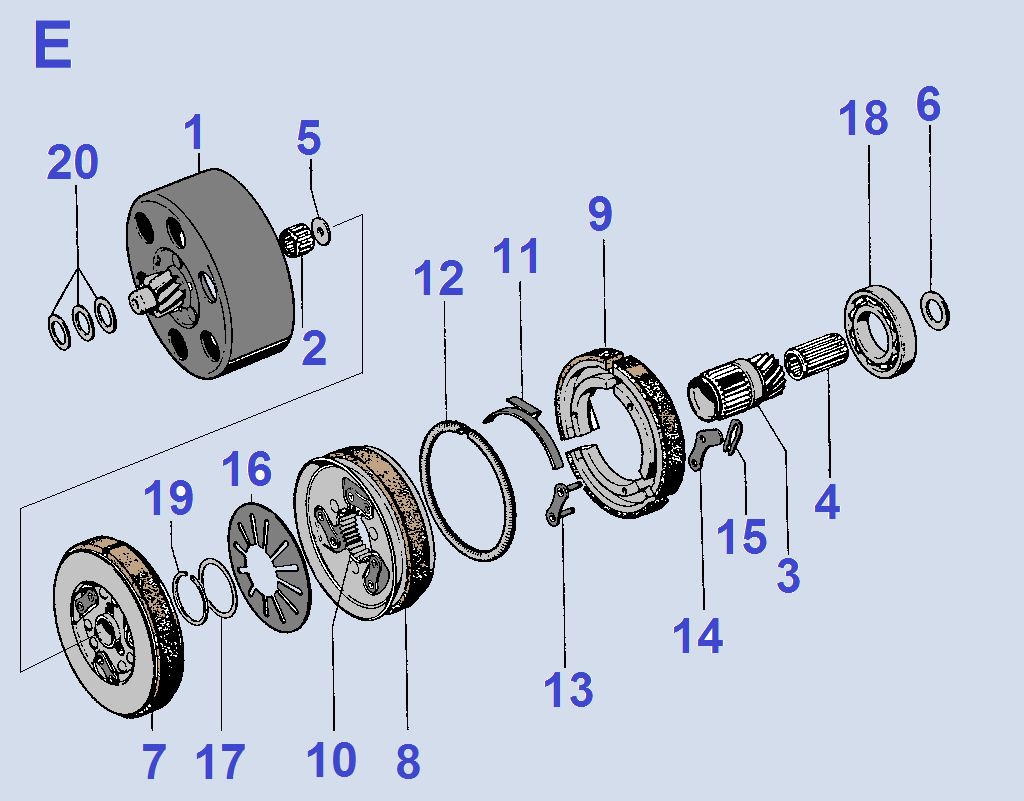
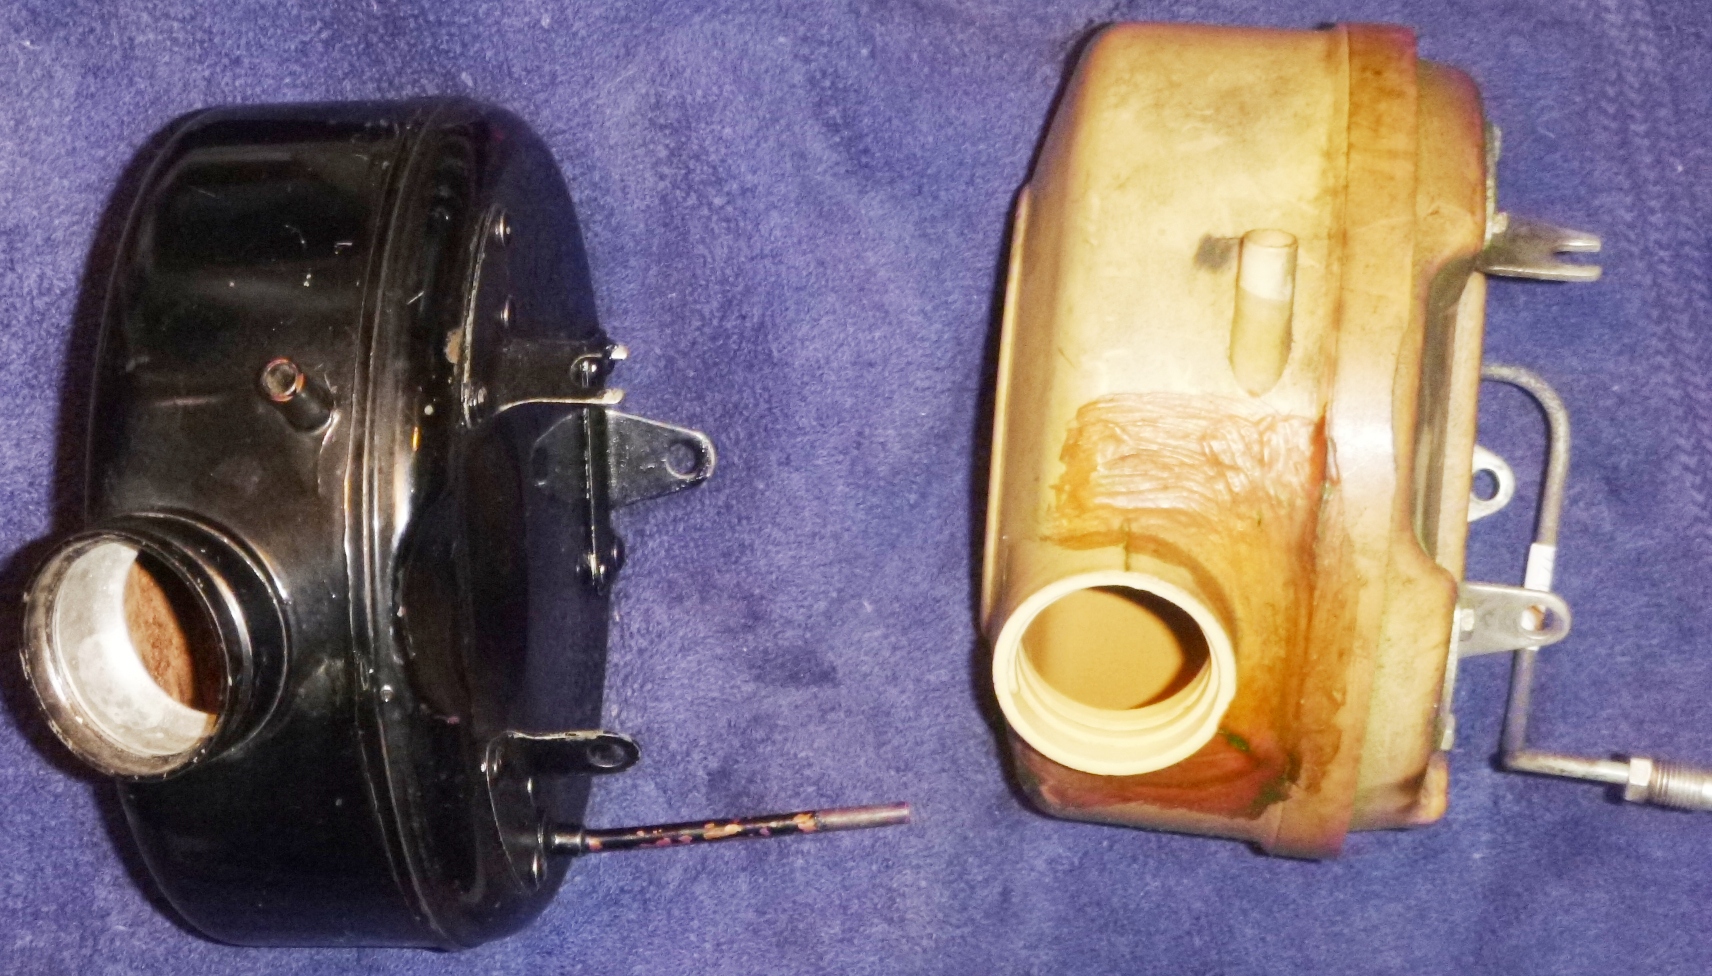
 Kreidler MP 9 Flory moped was the export-to-USA version of a German-model MP 2. Other MP 2 export (non-German) versions worldwide include MP 6, MP 7, and MP 8. Some things are the same. The MP 9 air filter has “MP 8” molded into it. The MP 9 parts price list uses the term “MP 7” for those parts used only on the more restricted MP 9 models. See below “USA Speed Versions”.
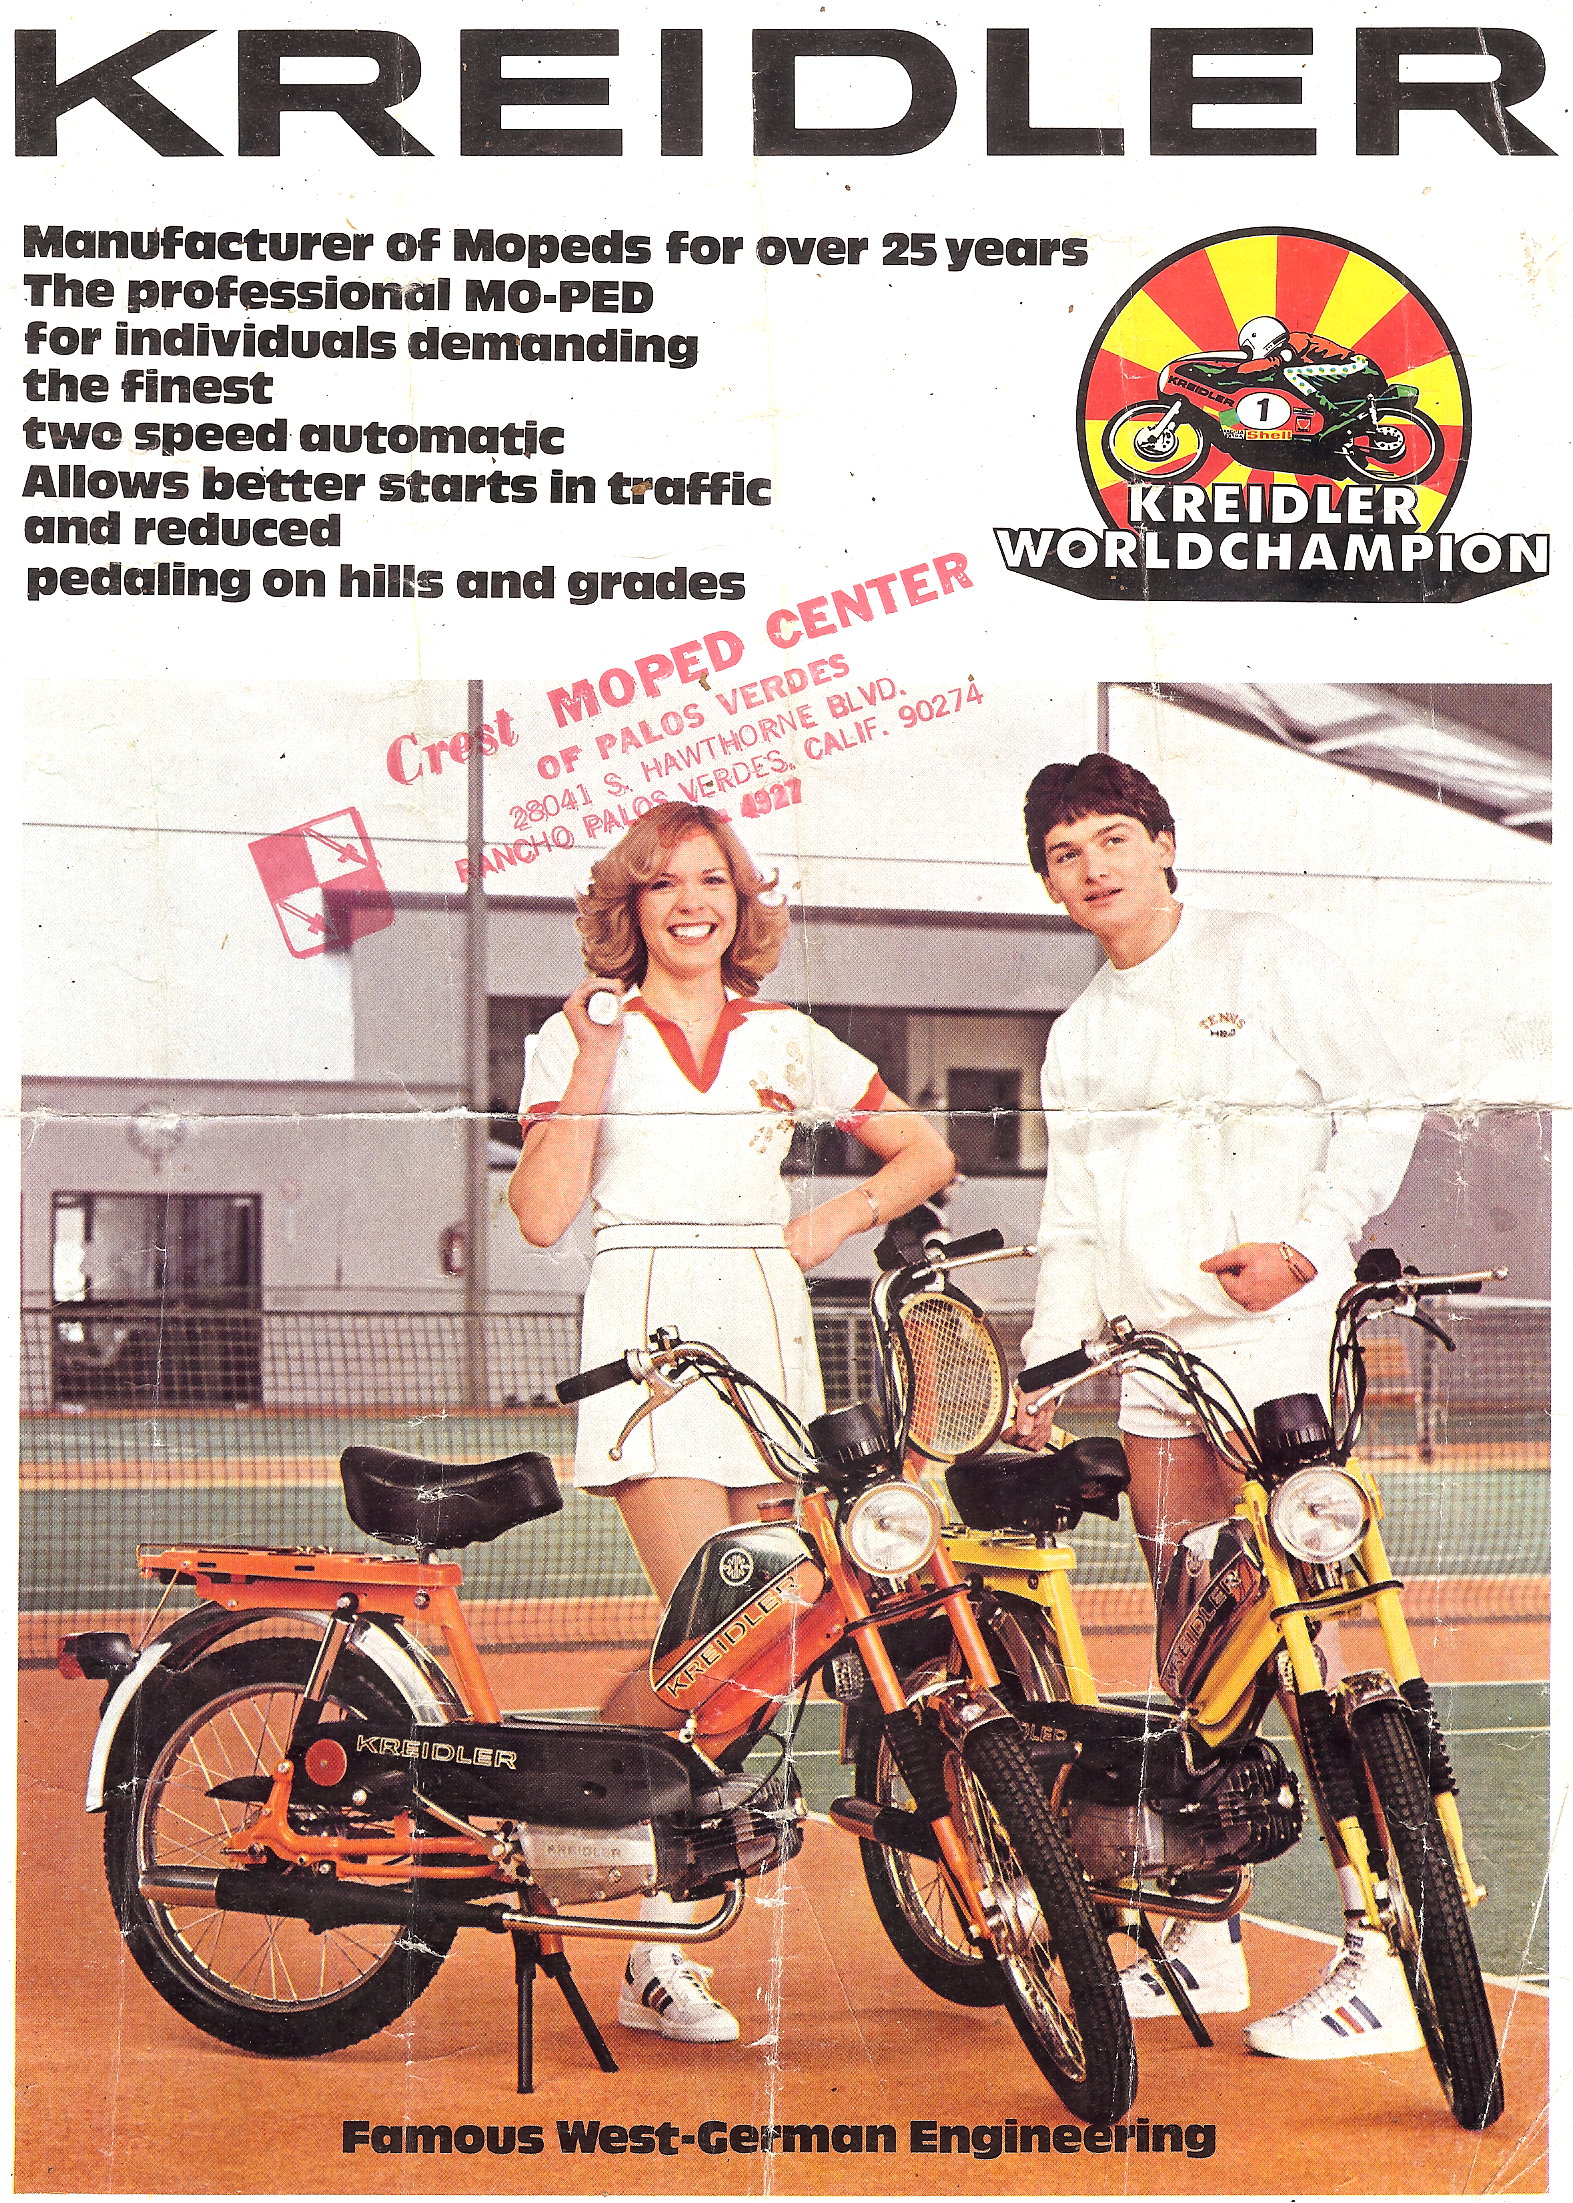


